
 The
Great Cap Rack
The
Great Cap Rack

- Being the professionals that Adam P. and I are,
we both wanted the best looking cap rack possible. For those of you who
don't know what a capacitor or "cap" is, it's simply a typically
cylinder shaped tube that is put in line with your power wire. This tube
stores juice until your amp(s) need it. With most bass mobiles or any smaller
system, this addition is a valuable necessity. The average cap has a rating
of between 500,000 micro farud and 1,000,000 micro farud. Since Adam's
system draws not that much wattage, we really only needed a 1,000,000 micro
farud cap. Now, since one cap set in the middle of this huge box wouldn't
look all that great, we decided to go for a larger number. We came upon
the figure of 10 100,000 caps. I think the caps are actually rated a bit
higher than this, but I digress. The reason for this number is that they
are not all that expensive and with 10 of them, it will give a better look
without being over or under powered.
-
- I got the idea for a fiberglass amp rack when
I was surfing around the net at school one day durring a spare. I came
upon a site called the The Warbird
. I got quite a bit from this site. So, I read up on the practice that
he used in other applications and liked the outcome. I decided to alter
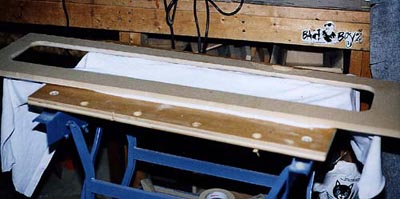
it a bit and use it for our fiberglass amp rack. First, you take a piece
of scrap MDF to be used as a frame. The desired width and height can be
achieved by the size of the cutout in the centre.
-
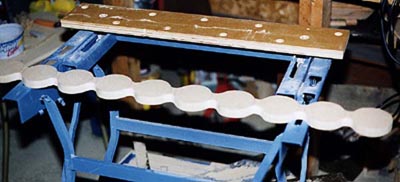
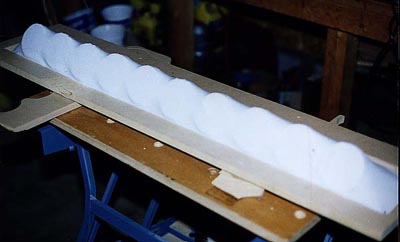
- With the piece you cut out of the middle, make
a template of the caps. This is really simple. Just take a cap, trace it
onto the wood, and trace another one 3/4" away from it. Make sure
you keep it straight and even to get a good final look. Now cut it out
and you're ready for the next step.
-
- Everyone has the odd accident. Once in a while
I will be eating spagetti and accidently drop a big clump on my nice t-shirt.
I guess you could just wash the shirt and get the stain out, but since
I'm a college kid, I only do laundry once every couple weeks when I go
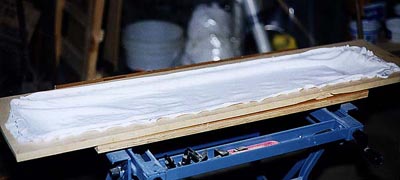
home, so this stain ain't coming out. Most people would throw the shirt
out at this point. Not me. Take that stained old shirt and cut the back
out of it. Use that nice clean part of the shirt to be used as the base
for your cap rack. Staple it to the front of your frame every inch or two
to get a good hold. Leave it rather loose so that the material can stretch
a lot without ripping at the edges.
-
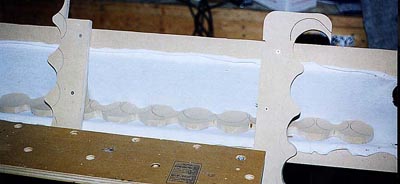
- As you can see, there is a certain point where
it's being stretched too much. It ripped a bit at the right corner, but
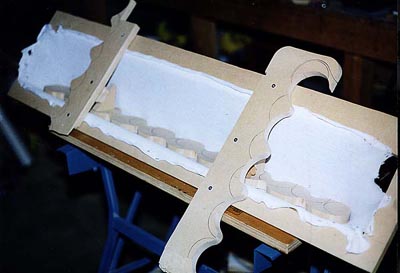
that will end up being cut away and covered. Now, you take that cap template
you made of the scrap MDF and cover the bottom of it with plastic so the
glass won't adhere to it. Cut a couple of 45 degree angle pieces of wood
and some other small square blocks to get the propper angle of the final
product.
-
- Once you tack the template in, you can adjust
it to the right spot before you put the final screws in.
-
- Now you are ready to put the fiberglass on the
backside. Good luck.
- Fiberglass stage