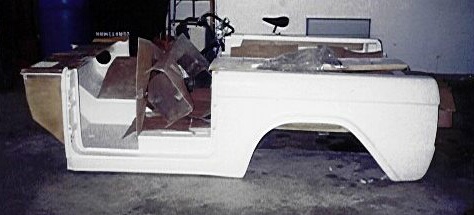
This is the story about my Kentrol body installation. I will try to describe and show how I assembled my Kentrol Fiberglass Replacement Bronco Body. The parts I got were the tub, radiator support, grill, front inner and outer fenders, and hood. I was able to reuse my windshield frame and top, and I bought a used tailgate from someone on the EBML .
 Usually the first thing to
do is to put the tub on the frame with the proper body mounts. In my case
I had a three inch body lift with poly bushings. I set the entire mount
up like it would be so I could just set the body on it. Once I got all
the mounts in place, I was ready to put the body on the frame. Four people
can easily pick up and carry the Kentrol tub. Three very health young men
can do the same.
Usually the first thing to
do is to put the tub on the frame with the proper body mounts. In my case
I had a three inch body lift with poly bushings. I set the entire mount
up like it would be so I could just set the body on it. Once I got all
the mounts in place, I was ready to put the body on the frame. Four people
can easily pick up and carry the Kentrol tub. Three very health young men
can do the same.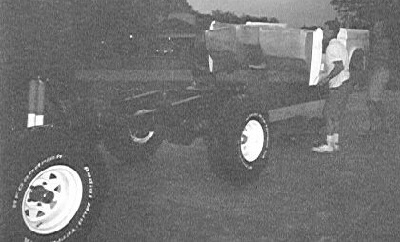 I was able
to get the front and rear mounting bolts through the body and mounts. Of
course the bolts were too short. The Kentrol 'glass body is a little thicker
than the old metal body. So I had to find longer bolts. While I was getting
longer bolts, I went ahead and got 1/2" thick bolts instead of the 7/16"
bolts that came with the body mounts. After I had the body mounted and
had made my safety cage made, I decided to cut the cross support out of
the Kentrol body and replace it with a piece of 2x2" section of steel.
This new cross piece is now serving two functions, one, as a body support
and two, as cage mounting points. And I noticed that the rear most cross
support was already a 2x2" steel channel so all I really did was to duplicate
that design. And I also used the rear channel as cage mounting points too.
I was able
to get the front and rear mounting bolts through the body and mounts. Of
course the bolts were too short. The Kentrol 'glass body is a little thicker
than the old metal body. So I had to find longer bolts. While I was getting
longer bolts, I went ahead and got 1/2" thick bolts instead of the 7/16"
bolts that came with the body mounts. After I had the body mounted and
had made my safety cage made, I decided to cut the cross support out of
the Kentrol body and replace it with a piece of 2x2" section of steel.
This new cross piece is now serving two functions, one, as a body support
and two, as cage mounting points. And I noticed that the rear most cross
support was already a 2x2" steel channel so all I really did was to duplicate
that design. And I also used the rear channel as cage mounting points too.
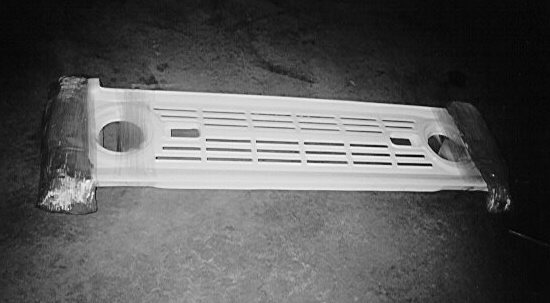
Assembling the front fenders, rad. support and grill 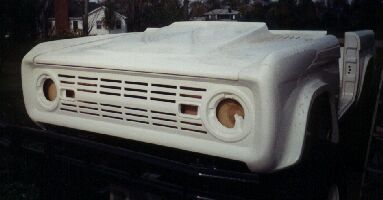 was a very interesting
feat to overcome. Kentrol's directions are easily followable(is that a
word?) but leave some things out. The first thing to do is to mount the
inner fenders on the radiator support. There is only one way that these
pieces can go together. Then as per Kentrol's directions, I took
that assembly and slid it over my shock towers and into place. Again making
sure the front body mounts are in place. The bottom front of the inner
fenders need to be trimmed back a little bit in order for the body mounts
on the rad. support and the frame to match up. Basically the inner fenders
have too big of a lip. Not a big problem, I just took a permanent marker
and marked the section that needed to be cut away and took a dremmel tool
to it. I found some 8/32 bolts and nuts and used them to hold the rear
of this support/fenders assy. to the tub. By using these small bolts, I
am able to hold them in place without any effort at all, and still be able
to take them on and off easily. And since they only require a small hole
they can be easily filled, or drilled out to a bigger size later on if
necessary. The next thing I did was to take the grill/headlight assy. and
the outer fenders and bolt them together. These pieces have matching body
lines that need to match, so use extreme caution when mounting these pieces
together. By the way, I used 1/4" stainless nuts and bolts to attach all
the front end pieces together. Once I had the grill and fenders bolted
together they slide over the rad. support/inner fenders and into place.
Now the fun part came. Basically when you bolt the outer fenders
was a very interesting
feat to overcome. Kentrol's directions are easily followable(is that a
word?) but leave some things out. The first thing to do is to mount the
inner fenders on the radiator support. There is only one way that these
pieces can go together. Then as per Kentrol's directions, I took
that assembly and slid it over my shock towers and into place. Again making
sure the front body mounts are in place. The bottom front of the inner
fenders need to be trimmed back a little bit in order for the body mounts
on the rad. support and the frame to match up. Basically the inner fenders
have too big of a lip. Not a big problem, I just took a permanent marker
and marked the section that needed to be cut away and took a dremmel tool
to it. I found some 8/32 bolts and nuts and used them to hold the rear
of this support/fenders assy. to the tub. By using these small bolts, I
am able to hold them in place without any effort at all, and still be able
to take them on and off easily. And since they only require a small hole
they can be easily filled, or drilled out to a bigger size later on if
necessary. The next thing I did was to take the grill/headlight assy. and
the outer fenders and bolt them together. These pieces have matching body
lines that need to match, so use extreme caution when mounting these pieces
together. By the way, I used 1/4" stainless nuts and bolts to attach all
the front end pieces together. Once I had the grill and fenders bolted
together they slide over the rad. support/inner fenders and into place.
Now the fun part came. Basically when you bolt the outer fenders 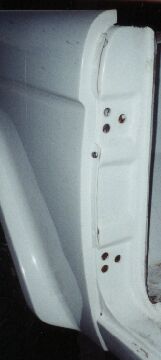 to the
grill, there is supposed to be enough room for them to slide over the inner
fenders where the inner fenders join the rad. support. Well, there wasn't.
I had to grind a lot of fiberglass off the inner fenders to get the outer
fenders on. It's still a tight fit to this day. Once that was accomplished,
I had to get the rear of the outer fenders to mount on the tub. Here, the
fun continues. I had to grind a LOT of fiberglass off the tub to get the
fenders to fit. I don't think I took any off the fenders, I took it all
off the tub, and there's plenty of material there, so don't worry about
compromising the strength of the tub. Then I had to drill the holes in
the rear end of the fenders for the three mounting screws that get screwed
into the tub. That wasn't too bad, except when I went to tighten them up,
I ended up cracking the mounting tabs on the fenders almost clean off.
I have yet to find a solution for this problem. And it is a major one.
After I had all the fenders mounted, I decided it was time to mount the
windshield frame/hood mounting piece. This is bare metal, if I was smart,
I would have had it powder coated, but I painted it with POR-15 instead.
to the
grill, there is supposed to be enough room for them to slide over the inner
fenders where the inner fenders join the rad. support. Well, there wasn't.
I had to grind a lot of fiberglass off the inner fenders to get the outer
fenders on. It's still a tight fit to this day. Once that was accomplished,
I had to get the rear of the outer fenders to mount on the tub. Here, the
fun continues. I had to grind a LOT of fiberglass off the tub to get the
fenders to fit. I don't think I took any off the fenders, I took it all
off the tub, and there's plenty of material there, so don't worry about
compromising the strength of the tub. Then I had to drill the holes in
the rear end of the fenders for the three mounting screws that get screwed
into the tub. That wasn't too bad, except when I went to tighten them up,
I ended up cracking the mounting tabs on the fenders almost clean off.
I have yet to find a solution for this problem. And it is a major one.
After I had all the fenders mounted, I decided it was time to mount the
windshield frame/hood mounting piece. This is bare metal, if I was smart,
I would have had it powder coated, but I painted it with POR-15 instead.
Kentrol says not to tighten up any of your mounting bolts until you have everything aligned. Which means fenders (both inner and outer), rad. support, grill, hood and doors (didn't use mine). Once you have all that aligned, then go ahead and tighten everything up. Again, make sure you use stainless steel hardware if possible. Since you took the time to get a 'glass body, you might as well get fasteners that will never rust too.
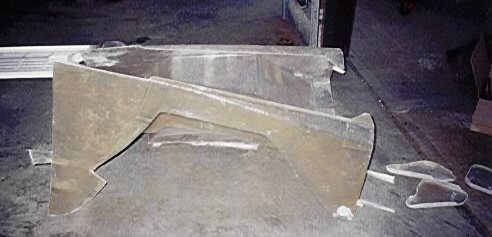
Once I had all that assembled, I moved back to the tub. One 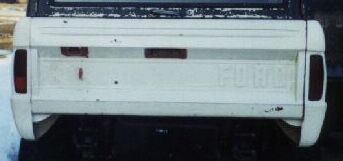 of the first things I did was to mount the tailgate. This is not an easy feat
to overcome, especially when your doing it by yourself. Now I had to mount
everything under the dash, including the dash itself. Along with everything
that mounts to the firewall. The easiest way I found was to have the old
body sitting right next to the new one and make a template of the old firewall
and just trasfere the template to the new tub. This proved to work extremely
well as both the old tub and new tub were almost identicle. Once I had
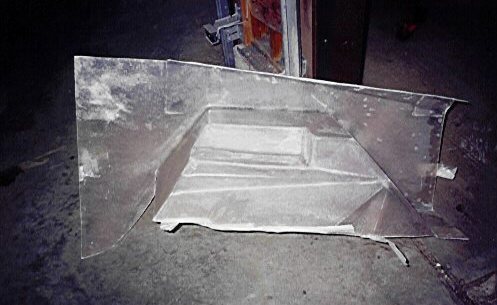
everything marked, I used both a dremel to grind out some of the more interesting
shaped holes, and I also used a variety of hole saws. I drilled, cut, and
ground out holes for the steering column, the column mount, brake booster
bracket/pedal assy mount, speedo cable, throttle cable, emergency brake
pedal mount, wiring, heater and water lines, clutch rod, and transfere
case shifter. After I had all these holes opened, I mounted everything
and made sure everything hooked up correctly and functioned properly, then
took it all back apart. I also drilled all the holes I needed for my cage
mounts. Once I was done drilling holes, I took the tub and had the inside
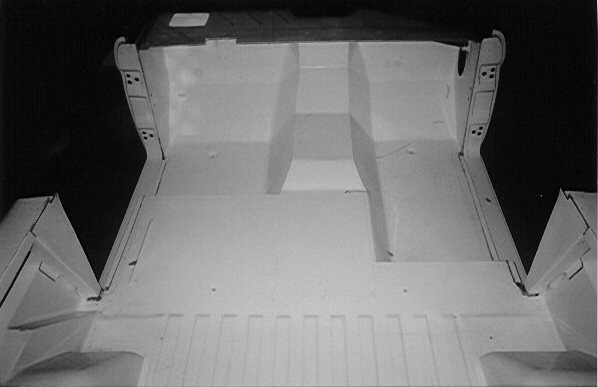
sprayed with BedRock, a spray-in bed liner. Once that was done, I put the
dash support in, and started installing my new Centec Wiring Harness. I
didn't get too far and had to go back to school, so I stoped working on
that, and put the dash, windshield frame, cage, and front end back on the
vehicle. So basicly I am done working on the body.
of the first things I did was to mount the tailgate. This is not an easy feat
to overcome, especially when your doing it by yourself. Now I had to mount
everything under the dash, including the dash itself. Along with everything
that mounts to the firewall. The easiest way I found was to have the old
body sitting right next to the new one and make a template of the old firewall
and just trasfere the template to the new tub. This proved to work extremely
well as both the old tub and new tub were almost identicle. Once I had
everything marked, I used both a dremel to grind out some of the more interesting
shaped holes, and I also used a variety of hole saws. I drilled, cut, and
ground out holes for the steering column, the column mount, brake booster
bracket/pedal assy mount, speedo cable, throttle cable, emergency brake
pedal mount, wiring, heater and water lines, clutch rod, and transfere
case shifter. After I had all these holes opened, I mounted everything
and made sure everything hooked up correctly and functioned properly, then
took it all back apart. I also drilled all the holes I needed for my cage
mounts. Once I was done drilling holes, I took the tub and had the inside
sprayed with BedRock, a spray-in bed liner. Once that was done, I put the
dash support in, and started installing my new Centec Wiring Harness. I
didn't get too far and had to go back to school, so I stoped working on
that, and put the dash, windshield frame, cage, and front end back on the
vehicle. So basicly I am done working on the body.
Until I get it sprayed with a nice Ford blue color with a flex additive, I'm going to use it with a gell coat as the exterior color. What's the flex aditive for? The flex aditive will help prevent any stress cracks that may occur during severe suspension/body flex. So that's the install of my Kentrol Fiberglass Replacement Bronco Body. If you have any questions, feel free to e-mail me.
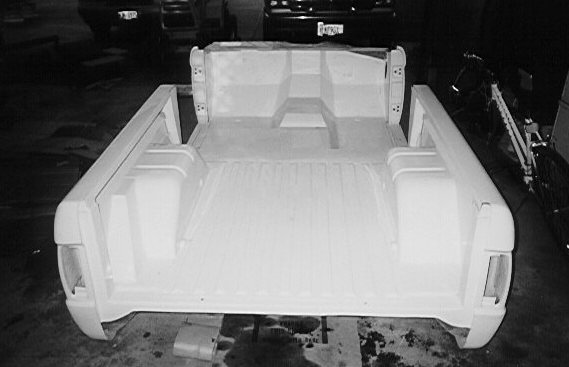
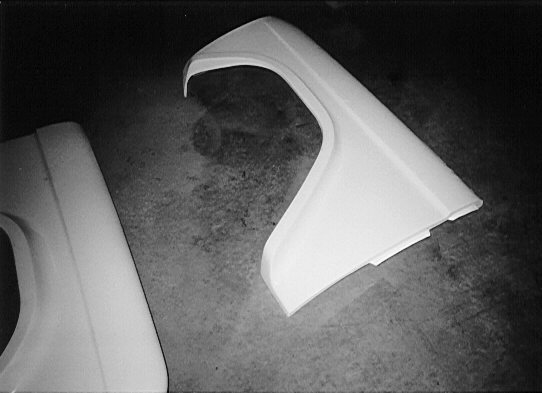
Since I have nothing else to tell you about I will show you what all my body panels look like strait from Kentrol. These are thumbnails so just click on them for a slightly larger version of the same picture.


BACK
to my Bronco page.