Warning: I am posting these directions
on how to build these braces for informational purposes only.
I have had no problems with the ones I put in my car and neither
has Jason Sherrill, but if you decide to put them in your car,
you are responsible for any damage or injury that may occur. Minor
collisions could cause a lot of damage and possibly even injury
with these braces installed since everything is braced together,
which may effect crumple zones.
Front Diagonal Braces Step by Step
It took me two full days to build these
braces. Although I had to spend a lot of time figuring out how
to do it. Also, most of the second day was spent painting.
Materials List
Step 1.
Determine where you are going to fasten
the braces in the front. I fastened mine to the metal that is
just over the radiator. The closer to the middle you get the better,
but you need to keep in mind that there are things you may need
to go up and over to clear.
Step 2.
Once you have determined you front
mounting points, measure the distance from the front strut tower
bolt to your front mounting point, and cut two 1 inch wide by
3/16 thick pieces of steel. Remember it is a lot easier to cut
more off than to make it longer.
Step 3.
Remove the front strut tower bolts
Step 4.
Drill a hole in one end of your brace
big enough for the strut tower bolt to fit through. I think I
used a 5/16 inch drill bit, but I can't remember for sure.
Step 5.
Just set your brace on the shock tower
to see if it will line up. I had to cut the end at an angle on
the strut tower end for it to fit.
Step 6.
Bend and twist your brace so that it
sits flat at both the strut tower and your front mounting point.
I used two BIG pipe wrenches to do this. A table vice would be
MUCH easier though.
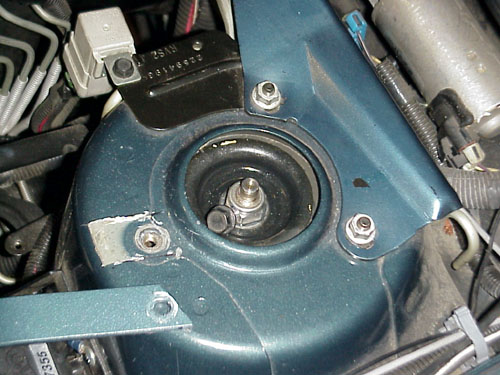
Step 7.
Once you have your brace so that it
will sit flat at both the mounting points, it will be necessary
to cut away the top layer of metal on the strut tower under your
brace in order for your brace to fit flat against the whole for
the strut tower bolt. Just lay your brace on your mounting points
and trace the edges on the strut tower. I used a Dremel tool to
cut it out and it only took about 1 minute per side (see picture
below).
 Step 8.
Bolt your brace to the strut tower.
Hold it firmly in place while you drill the whole for your front
mounting point. I used a 5/16 inch bolt up front. I drilled through
the brace and the metal on top of the radiator at the same time
so I knew they would line up. BE CAREFUL NOT TO DRILL TOO DEEP
OR YOU COULD GO INTO THE RADIATOR! Go slowly.
Step 9.
Get a 1/4 inch square rod and cut it
to fit under your brace (see picture in step 10).
Step 10.
Weld the 1/4 square rod in place (I
took mine to a local muffler shop and they did it for free). See
picture below.
Step 8.
Bolt your brace to the strut tower.
Hold it firmly in place while you drill the whole for your front
mounting point. I used a 5/16 inch bolt up front. I drilled through
the brace and the metal on top of the radiator at the same time
so I knew they would line up. BE CAREFUL NOT TO DRILL TOO DEEP
OR YOU COULD GO INTO THE RADIATOR! Go slowly.
Step 9.
Get a 1/4 inch square rod and cut it
to fit under your brace (see picture in step 10).
Step 10.
Weld the 1/4 square rod in place (I
took mine to a local muffler shop and they did it for free). See
picture below.
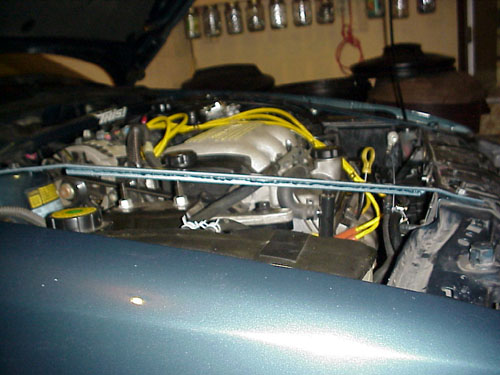 Sorry this is so blurry, but you can
see the 1/4 inch square rod welded to the bottom of the brace.
It really makes the brace stiff. I can't budge mine no matter
how hard I reef on it.
Step 11.
Repeat the same procedures to make
a brace for the other side.
Step 12.
Prime and paint the brace to the color
of your choice. I had some paint left over from when I had my
front bumper painted and installed, so I used that. I think it
looks sharp since it matches the car. It almost looks like it
could have come that way stock.
Step 13.
Bolt everything up tightly and go test
it out. I don't know for sure that this brace improves handling.
I do know, however, that now when I put the jack right behind
the front tire and jack up the car, both the front tire and the
rear tire come off the ground AT THE SAME TIME. That did not happen
before. The rear tire would stay on the ground much longer. Therefore,
the body of the car has been made stiffer, and stiffer is usually
better.
Under Hood
and Trunk
Home
Sorry this is so blurry, but you can
see the 1/4 inch square rod welded to the bottom of the brace.
It really makes the brace stiff. I can't budge mine no matter
how hard I reef on it.
Step 11.
Repeat the same procedures to make
a brace for the other side.
Step 12.
Prime and paint the brace to the color
of your choice. I had some paint left over from when I had my
front bumper painted and installed, so I used that. I think it
looks sharp since it matches the car. It almost looks like it
could have come that way stock.
Step 13.
Bolt everything up tightly and go test
it out. I don't know for sure that this brace improves handling.
I do know, however, that now when I put the jack right behind
the front tire and jack up the car, both the front tire and the
rear tire come off the ground AT THE SAME TIME. That did not happen
before. The rear tire would stay on the ground much longer. Therefore,
the body of the car has been made stiffer, and stiffer is usually
better.
Under Hood
and Trunk
Home