The transmission is straightforward to remove but is very heavy. Mechanical aids are required to deal with supporting the weight, particularly during reassembly.
Remove the rear prop shaft by splitting the universal joint at the axle and pulling the shaft out of the transmission. Disconnect the front drive shaft at the flange plate couplings each end and remove the support bearing bracket and starter motor. Access to the shaft and it's removal is much easier if the cross member running under the rear of the engine sump is removed. Replace the crossmember after removing the shaft and use it to support the weight of the back of the engine using a block of wood as a spacer and load spreader under the sump.
Release the gearshift and downshift cable linkages and Maxaret cables, then unbolt the bell housing from the engine and remove the rear crossmember/gearbox mounting. The transmission assembly will move backwards and down clear of the car. Ensure that the torque converter remains fully located in the bell housing during removal. If working in a pit and not using jacks, it will take four strong pairs of hands to handle the weight.
Removing the chain unit from the differential and gearbox is covered in the works manual. (Martin Robey can supply a good quality copy of the original works manual.)
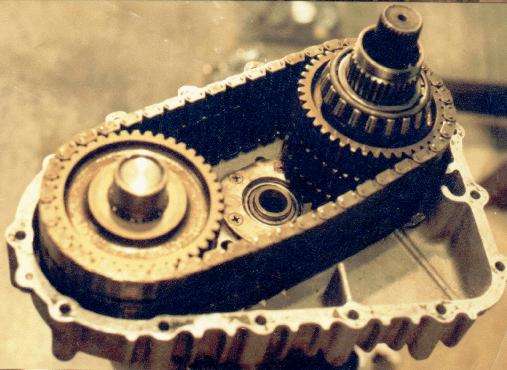
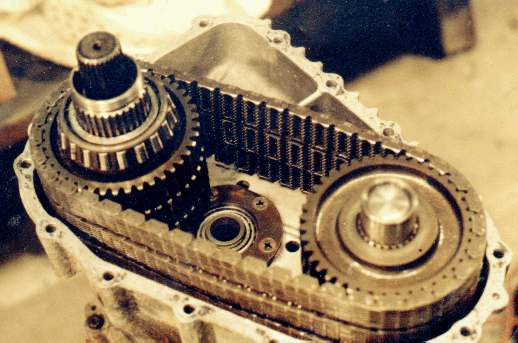
The driven chain sprockets will be loose in the case with the front drive shaft removed. This allows the sprockets to be lifted out and the three chains removed. There is a spacer between each sprocket. Note also that the rear bearing for the front drive shaft is fitted with a flanged reducing bush in the centre. If the bearing is to be replaced, press the bush out before discarding the old bearing.
If it is intended to replace the large bearings on the driving sprocket shaft, then the driving sprocket gear cluster will need to be removed from the rear casing. This requires a special tool to release the locking ring which has four notches cut into the outside diameter. There is a lock tab washer under the ring which is deformed into two of the notches. Punch the locks flat first and then release the ring. Again, the ring is secured with Loctite and is very difficult to release even with a tool.
If replacing bearings, the outer shells of the taper roller bearings are a tight fit in the casing. If the shells get a bit damaged removing them it does not matter but to preserve the new ones in good condition try putting the shells in the deep freeze while the case goes in the fan oven at 100 degrees C for 10 minutes. The shrinkage of the bearing shell and the expansion of the casing are such that, using gloves, the new shells literally drop in place and tighten as the temperatures equalise. The reverse works well for fitting bearings to shafts. i.e. bearings in oven, shaft in freezer. Don't be tempted to use a blow lamp to heat bearings and particularly casings. The heat can be uneven and crack cases or destroy temper of bearings.
The seals and bearings are all available from bearing suppliers using the numbers in the list. Note that taper roller bearings require two numbers, one inner and one outer, as the makers mix and match inners and outers.
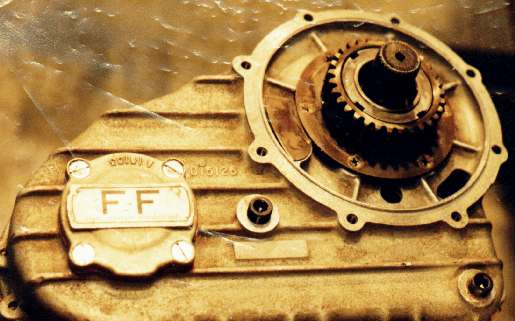
I failed to locate a source of Morse chains so reused the original ones
despite them being slightly stretched. The Maxaret unit has a special thick
cork gasket which I obtained from Cropredy Bridge Garage. When refitting
the torque converter to the gearbox check that the converter is fully home
into the pump drive. It can give the appearance of being in place but is
in fact too far out on the shaft making it impossible to assemble to the
engine. To check, measure the distance between the front face of the bell
casing and the top face of the bolt holes that secure the converter to
the engine crank. This must be at least 1/2".
| LIMITED SLIP CLUTCH SHAFT REAR BEARING | LM67048/LM67010 |
| DRIVE SPROCKET SHAFT BEARINGS (2 OFF) | 385/382A |
| DRIVEN SPROCKET SHAFT BEARINGS (2 OFF) | LM501349/LM501310 |
| ANNULUS BEARING-REAR DIFFERENTIAL | XXLJ45C OR 6009NR |
| FRONT DRIVE SHAFT SEAL (DUAL LIP) | W25018731R6 |
| TORQUE CONVERTER TO PUMP SEAL (CLUTCH) | 1942020 |
| FRONT DRIVE SHAFT SUPPORT BEARING UNDER STARTER MOTOR | 7G88506 |
| INNER AND OUTER BEARINGS | 18690/18620 |
| SEALS FOR ABOVE | NTK 1092 SC 337 287 18 |
[This description was written by Lawrence Ogbourne, a UK based FF owner.
Lawrence forwarded this description and photos to the JOC FF Technical
adviser to help other FF owners. The FF page is please to be able to make
this available to the FF community at large. All owners are encouraged
to make similar summaries available to us all! This information
is provided on an "as is" basis. No responsibility whatsoever is assumed
by the Author, the FF home page, JOC, for the accuracy and quality of any
information provided.]