Miniature University Workshop: Spring Gardens
Lesson #4
Instructors: Ruth Nier, Anke from Holland, and Melissa Darnell
Email Ruth with Potting Soil Bag questions: [email protected]
Email Anke with Garden Toolbag questions: [email protected]
Email Melissa with questions regarding other projects: [email protected]
Gardening Tools and Garden Accessories
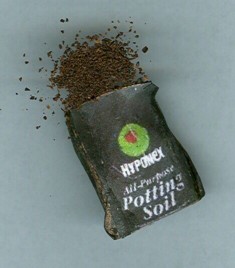
Potting Soil Bag
 Materials/Tools
Needed:
Materials/Tools
Needed:
Label for bag
Dime wrapper
Tooth pick
White glue - that dries clear
Dried used coffee grounds (or tea leaves or soil)
Black or brown permanent marker (I use a Sharpie)
Time: 10 to 15 minutes
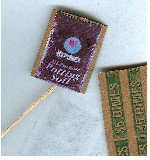
1. Print and cut out labels removing tabs and cut apart. Plain paper is fine. One will be for the front and one for the back.
2. Cut dime wrapper to proper size using printie to measure. Glue label onto wrapper - front and back. Using a toothpick glue bottom of cut wrapper together.
3. Gently open top, be careful to keep bottom closed. Pour some glue into the wrapper and fill with small amount of coffee grounds. Do not try to fill bag all at once. Tamp down with toothpick. Turn upside down to remove loose coffee grounds.
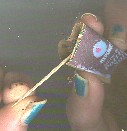
4. Repeat until bag is full. While you are doing this you will find the glue has made the bag somewhat damp. This is your opportunity to crease, dent, or otherwise distress the bag. You could put some rips into the top at this stage.
5. Using a black or brown permanent marker color the sides of the bag where the dime wrapper still shows. Bring some of the color onto the label to blend into the label.
6. Set aside to dry.
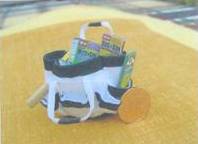
Garden Toolbag
Materials/Tools Needed:
white cotton, about 10 x 17 cm, starched if necessary
green or brown cotton, to make the bottom 4 x 5 cm, 2 handles each 1 x 1 cm, and two edge trims each 15 x 0.5 cm
2 handles each 10 x 0.5 cm cut from white cotton
* All patterns include a .2 mm seam allowance. Print out the garden toolbag pattern below to help you put together your toolbag.
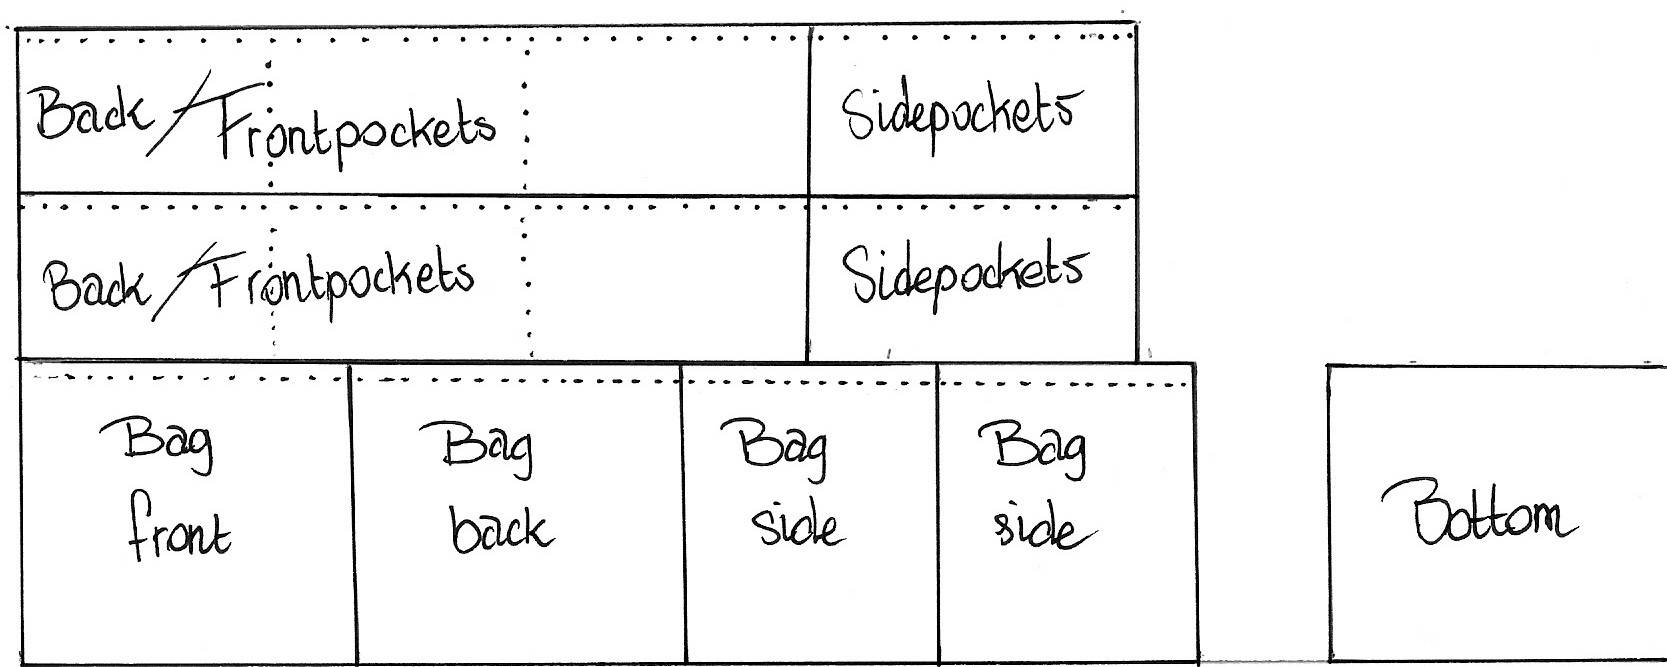
1. Overcast the front and side parts of the bag with the contrast material (the inside and outside).
2. Glue a contrast strip against the top of the front and side pockets.
3. Sew the pockets vertically on the dotted lines on the front and back parts.
4. Sew the side parts between the front and back parts, as well as the pockets of the side parts.
5. Sew closed the bottom of the bag.
6. Sew or glue the handles folded in half lengthwise, then glue a little piece of contrast material in the middle of each handle.
7. The sew the handles onto both sides of the bag.
8. Of course, you can make the bag also with just pockets on one side, or smaller, or lower, or higher, or with double pockets, etc.
I wish you success with the bag. If you have any questions, I'm only an email away!
Anke from Holland
Trash to Treasure Birdfeeder
Based on a project featured in the book "Workshop Wisdom" by Nutshell News magazine.
Materials/Tools Needed:
clear plastic straw
clear sequin
white/school glue
two or three toothpicks
small sewing needle
cigarette lighter or other small open flame source
rubber handled pliers (or something else to use to hold a hot wire with)
1. Holding the needle using a pair of pliers or wearing protective gloves, heat the tip of the needle over a fire.
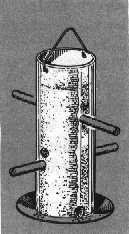
2. Immediately poke three sets of holes into the end of the plastic straw: one right near the edge of the straw's opening, and two slightly lower down for bird perches (be sure to have these two lower sets of holes on opposite "sides" of the straw as shown in the picture above).
3. Cut the straw to the size you want your birdfeeder to be.
4. Glue the clear sequin to the end of the birdfeeder opposite the holes that are closest to the edge. The sequin should be curved side down (like a bowl for the birdfeeder to rest in).
5. Cut two lengths of toothpicks, each twice as long as the width of the straw. Insert each one into a set of holes, skipping the holes at the top of the birdfeeder.
6. Fill the birdfeeder with a mixture of watered down white/school glue and ground black pepper to create convincing birdseed.
7. To hang your birdfeeder, thread a short piece of thread in either end of the top holes and glue in place to create a handle to hand your new birdfeeder from!
Trash to Treasure Watering Can
Materials/Tools Needed:
small plastic eye dropper or plastic bottle
scissors
empty throat lozenge package or other similar package with small plastic bubbles on it
barbecue skewer cut to 1 1/2" long
fine sandpaper
thin wire
acrylic paint in your choice of color for the finished watering can
1. Cut off the top section of the eye dropper or plastic bottle so that you're left with a section approximately 1" tall.
2. Cut a plastic bubble from the throat lozenge or similar package, then cut off the side rim around it until you have just the curved round part of the bubble. Cut this section in half and use it for the top of the watering can; glue in place.
3. Make two small holes at the back of the can for the handle, one hole towards the bottom front of the can for the spout, and two very small holes above the hole for the spout (this is where the spout braces will go).
4. To create a spout, cut a 1 1/2" length of barbecue skewer (half and one-fourth scales can use a smaller eye dropper and toothpick here). Use fine sandpaper to slightly taper one end of the spout, then insert and glue the other end of the spout into the spout hole previously made towards the lower front of the can.
5. Use a short length of very thin wire for the spout braces; wrap this wire around the spout once halfway along the spout's length, then insert the ends of the wire into the two small holes made for it in the can and glue in place.
6. Cut a short length of slightly thicker wire for the handle, bend it into a U shape, then insert and glue its ends into the back holes of the can.
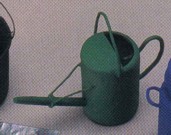
7. Paint the entire can green or silver and let dry.
8. Seal the paint with a coat or two of gloss finish varnish or sealant.
Gardening Tools
Materials/Tools Needed:
2 lengths of barbecue skewers each cut to 4" long (half and one-fourth scales use toothpicks instead)
3 lengths of barbecue skewers each cut to 3/4" long (half and one-fourth scales use toothpicks instead)
double-sided tape
silver foil (aluminum foil)
scissors
sandpaper
small drill
white/school glue
old toothbrush
sharp craft knife
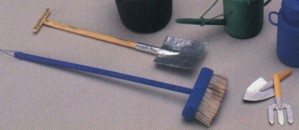
Broom: To make the broom, saw off the handle on an old toothbrush and sand the cut edge smooth. Drill a small hole in the center of the back of the brush. Put a dap of glue on one end of a 4" long skewer, then insert it into the drilled hole. Drill another hole (much smaller this time) in the other end of the skewer, then thread a short piece of thread through this hole and tie it in a loop for a handle to hang the broom on. Paint the handle of the broom to match the plastic back on the brush, or paint both the handle and broom back to match.
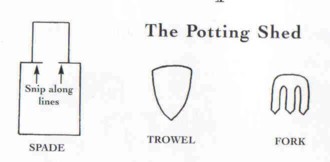
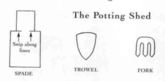
Spade: Use sandpaper to round off the ends of a 3/4" long skewer to create the spade end handle, then drill a small hole in the center of this handle end. Put a dab of glue on the end of a 4" long skewer and insert it into this hole to create the spade handle. Print out the above garden tools pattern at the end of this project for your scale of choice, cut out the spade pattern, and use it to cut out a spade blade from silver foil. Fold the foil blade in half so that the cuts at either end line up with each other and stick the two halves together using double-sided tape between them. Then wrap the tabs around the end of the spade handle and tape or glue in place.
Trowel and Fork: Cut out the paper patterns for making the trowel and fork in your scale of choice. Use these patterns to cut out two each of the fork and trowel shapes from foil. Glue the fork shapes together back to back, then glue the trowel shapes together back to back. Then glue 3/4" long skewers for a handles onto the fork and trowel.
Garden Tools Patterns, 1/12th Scale
Garden Tools Patterns, 1/2 Scale
Garden Tools Patterns, 1/4th Scale
![]()
Trash to Treasure Wooden Planter
Materials/Tools Needed:
empty plastic 35 mm camera film canister
sharp craft knife
rubbing alcohol and cloth or tissue
brown acrylic paint and paintbrush
aluminum foil
1. Begin by cutting the film canister in half using a sharp craft knife or saw. Sand the cut edges smooth.
2. Clean the outside of the canister with rubbing alcohol and let dry.
3. Paint the entire canister brown and let dry. Don't worry if streaks of the black plastic show through from underneath...this will help make the planter look more like it was made from real wood.
4. Cut two strips of foil about 1/4" wide, then wrap and glue the foil strips around the planter along its top and bottom edges.
5. You can then use your new planter as a pot to hold a large tree, as a container garden filled with mini flowers and plants, or even as a container pond using resin, clay or gold foil fish, and clay lily pads floating on the surface!
Antiqued Bronze Statuary
Based on a project from the book "Dollhouse Accessories, Fittings, and Fixtures," by Andrea Barham
Materials/Tools Needed:
large plastic cherub cake decoration (available in most department and craft stores)
small plastic wedding bell cake decoration
sharp craft knife or small saw
sandpaper
thick button to fit diameter of cherub base
thin button of about the same diameter
spray primer
hot glue gun and low temperature glue sticks
bronze paint and paintbrush
pale green acrylic paint
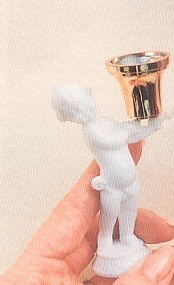
1. Begin by cutting or sawing off the cherub's wings. Sand all cut edges smooth.
2. Glue the cherub onto the thick button to create half a decorative base.
3. Glue the cherub and thick button onto the thin button to finish creating the decorative base.
4. Glue the bell upside down in the cherub's hands.
5. Spray the entire statuary with primer and let dry.
6. Paint the entire statuary bronze and let dry. Repeat if necessary to completely cover all surfaces.
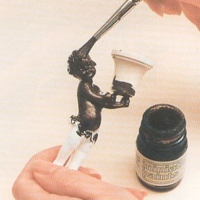
7. Dilute the green paint with a few drops of water, then paint the statuary with this green wash. Immediately wipe off most of the paint until green only remains in the recesses of the statuary. Wipe and polish the statuary.
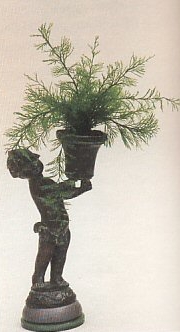
8. Fill with your favorite plant! The one pictured above is an air fern, an actual plant that can be found in many gardening centers and department stores.