Miniature University Workshop: Flooring
Lesson #2
Instructors: Mikki Perry and Melissa Darnell
Email Mikki with wood floor questions: [email protected]
Email Melissa with marble floor questions: [email protected]
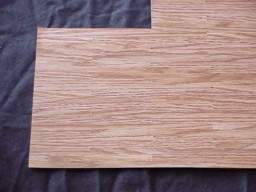
Wood Contact Floor
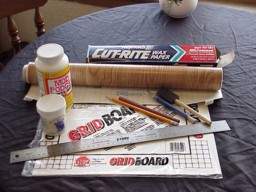
![]() Materials/Tools Needed:
Materials/Tools Needed:
 wood grain Contact paper
- scissors
- ruler
- Poster board or cardstock cut to fit your room
- X-acto knife and new, sharp blade
- Pencil
- Brown marker to match Con-Tact paper: NOT a permanent marker
- Soft rag or paper toweling
- Mod Podge or other decoupage sealer, matte is what I use; I guess you could use gloss
- Brush-I use the throwaway foam brushes
- Wax paper or freezer paper, or other non-stick surface, larger than your finished floor size
- Glue, double-face tape, or wallpaper paste to fasten “wood floor”
Please read directions through before beginning. This is a very easy project and hopefully my instructions are clear enough. As with anything, it’s a lot easier to show than write about, but maybe the photos will help.
Although the grain in the Con-tact paper before you begin looks very large, once you start cutting and when you assemble, it somehow looks right.
There are a couple of tips I’d like to give.1.) After your strips are cut, and while you are sticking them to the poster board, feel free to discard any that have large, obvious knots in them; this will help keep your floor looking more to scale. 2.) When laying down your strips, it is better to leave a sliver of a gap in between than to butt them too closely or overlap. Any poster board showing through will be covered with the marker. If you have them overlapping it will create a bumpy surface and they tend to peel up at the corners. 3.) When applying your Mod Podge, it’s better to use several thin coats, leaving to dry in between. This will level out your surface and create a smoother floor.
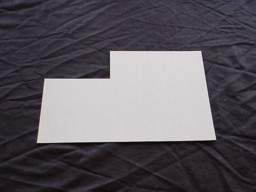
1. Cut your poster board to fit room floor. You can either do this by using a paper template first, or just cut the poster board to fit right away.
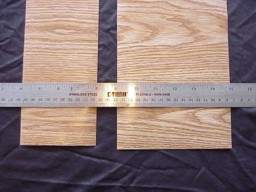
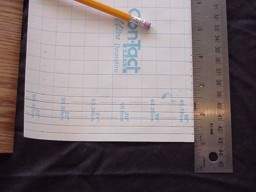
2. On the back of your sheet of Con-Tact paper, using your cork-backed ruler, measure up 4” along each side edge of the paper, and mark it with a pencil. Connect your two marks and draw a line that crosses the grain of the “wood”.
3. Using your ruler as a straight edge and a sharp knife, cut along this line. The roll of Con-Tact paper I have is 18” wide: I think this is the standard width. ( It also has a grid marked on the back which helps with measuring.) So, you should have now a strip of paper 18” x 4”.
4. Repeat Steps 2 and 3, but measuring up 6” this time, creating a strip of paper that is 18” x 6”.
5. You now have two pieces of Con-tact paper cut from the original big piece. (Depending on how big your finished floor measures, you may need to cut two 4”x 18” pieces and two 6”x 18” pieces.) On the 4” x 18” piece, measure up along the 18” sides and make little hash marks at ¼” intervals. Do this on both 18” edges. When you draw lines connecting these hash marks, you will end up with a series of parallel lines that run in the same direction as the “grain of wood”. Repeat this with the piece of 6” x 18” paper.
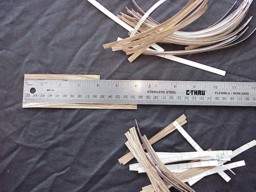
6. Using your sharp knife and ruler, cut along these lines, forming “floorboards”. You will end up with a bunch of 4” long floorboards and 6” long floorboards, both ¼” wide.
7. On your piece of poster board, decide if you’d like your floorboards to run from front to back or side to side in your room. Draw parallel lines with pencil in the direction you like, ¼” apart.
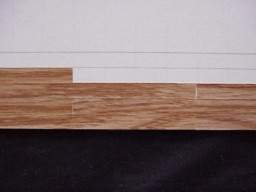
8. Starting in one corner of the “floor”, take a 6” piece, peel off the backing and lay it down along the edge, using your pencil lines as a guide so you lay your “boards” straight. Gently press it down so it sticks. Don’t stretch the Con-Tact paper, because I’ve found it will pull up and shrink back to its un-stretched length. Just lay it down and smooth it down. Now butt another “board” up to the end of this one, using a 4” piece this time. Depending on the dimension of your floor, this will be a little different for everyone. One floor might only use a couple of “boards” to run the length…another might use three or four. The idea is to alternate your board lengths as in a real wood planked floor.
9. Don’t worry about trimming the edges that overhang your poster board right now…you can trim them all when it’s done. Or, if you want to make use of the shorter overhanging pieces, depending on how long they are, you can trim them now and use them right away. It’s up to you.
10. Continue alternating your board lengths, and repeat this row after row, until your poster board floor is covered. Gently smooth down your floor, making sure no little corners are sticking up or anything. If you haven’t been trimming your edges as you go, then do so now. I would do this with a scissors though, because if you use a knife, you might pull your boards out of position, or stretch the Con-Tact paper. It’s very easy to just pick up the floor and trim the edges all around.
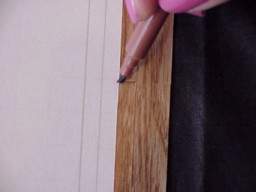
11. Take your brown marker and use it to touch up where any poster board might be showing between your floorboards. You may have to press a little firmly to get the color to flow down into the gaps. Then take a damp (not wet) paper towel or soft rag, and gently wipe the surface to remove any marker from the surface of the floor. The purpose of the marker is just to touch up any gaps that might show through your floorboards.
12. Make sure your floor surface is dry after wiping with the damp cloth.
13. Lay your floor on a piece of waxed paper or freezer paper, or some non-stick surface. Using your brush and Mod-Podge, you can now finish your floor. I brush in the direction of the grain, not against it. Leave to dry. Several thin coats may be necessary.
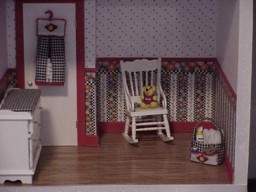
14. You can now place your floor in your roombox or dollhouse. It’s your choice how you want to fasten it: (depending on how permanent you’d like it to be) with glue, double faced tape, or wallpaper glue. Even a glue stick would work. You can weight the floor to dry evenly, but I’ve never found it necessary.
Black and White Marble Tile Floor
Materials/Tools Needed:
- white marble Contact (self-adhesive shelf liner) paper - available at most department stores
- black marble Contact paper
- scissors
- ruler
- Poster board or cardstock cut to fit your room
- X-acto knife and new, sharp blade
- Pencil
- Wax paper or freezer paper, or other non-stick surface, larger than your finished floor size
- Glue, double-face tape, or wallpaper paste to fasten “wood floor”
1. To create a black and white marble tiled floor (also sometimes referred to as a "french parquet floor"), first create a template of the floor for the room you want to decorate. This is most easily done by cutting a piece of newspaper to a size slightly larger than the room, then pressing it into the room. Use your fingernail or a pencil to make creases along the base of each wall, then remove the newspaper from the room and cut off the extra paper along the creases.
2. Use the template to create a posterboard "false floor" for your room. Not only will this false floor make it possible for you to change the flooring later on, but it will also make it MUCH easier to apply this flooring in any direction you choose.
3. Now cut several strips from your black marble Contact paper in the appropriate width for your scale (1" wide for 1/12th scale settings, .5" wide for 1/2 scale settings, or .25" wide for 1/4th scale settings). Repeat with the white marble Contact paper.
4. Now measure and cut each strip into squares (hint: most Contact paper has a grid printed on the back that you can use to help make perfectly straight cuts).
5. Decide which direction you want your checker board pattern to run. You can have the pattern run in either a vertical and horizontal direction, or at a 45 degree angle.
6. Starting in the front left or front right corner, begin applying the squares of Contact paper to the false floor in a checker (alternating) pattern. Be sure to position the edges of the squares as close together as possible, but do not overlap or your flooring will eventually begin to peel up.
7. Once your false floor is covered, you can then either permanently glue in the false floor into the room setting OR you can use double-sided tape to temporarily position it within the room.