Miniature University Workshop: Stained Glass Greenhouse
Lesson #3
Instructor: Melissa Darnell
Email for questions: [email protected]
Finishing the Building
Materials/Tools Needed Today:
gift wrapping tape
industrial strength glue or hot glue gun with low temperature glue sticks
pencil
green 1/2" foam core board (or white foam core board and green spray paint)
craft knife
2 wooden toothpicks (could also use lollipop sticks if toothpicks aren't available)
1. Start by putting the plastic portion of the building together (save the roof sections for last). To do this, turn each wall so that the painted side is to the inside of the building, then use long pieces of clear gift wrapping tape at each corner to tape the walls together. Apply the tape to both the outside AND inside of each corner for a stronger, sturdier building.
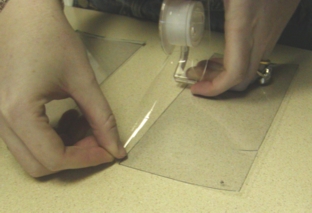
2. Once you have all the walls put together, tape the roof sections together along their longest sides, but only apply tape to the unpainted side (this allows the joint where they are attached together to bend a little so that the roof can rest over the top of the building). If you previously cut out your doors to create working doors, decide which side of the doors you want the hinges to be on, then apply two short pieces of tape as hinges on that side of the doors.
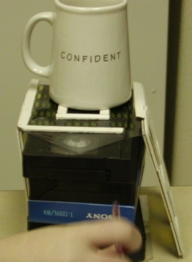
3. Now glue on all the framework to the outsides and insides of the walls and doors. If your plastic has a bit of a curve to it (this happens sometimes if it was curved over a package previously), you’ll need to set something heavy on top of each framework section to hold the plastic flat while the framework’s glue dries. In the picture below, you’ll see I had to be a little creative to do this for the outsides of the walls... I stacked several video tapes together to fill the inside of the building, then set heavy coffee cups on top of the framework while the glue dried!
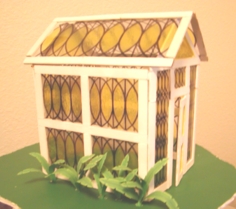
4. For the roof, only glue framework sections to the outside (unpainted sides) of the roof. This will allow the roof to bend and rest easily on top of the building. Once the framework glue dries, you can rest the roof on top of your house, then easily remove it any time you’re ready to decorate the inside of your greenhouse!
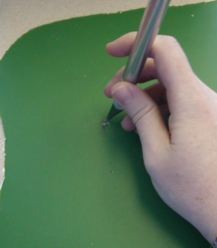
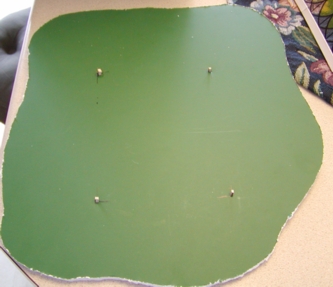
5. Congratulations, the building portion of your greenhouse is now complete! If you want to add it to the outside of a dollhouse you have or some other setting, you can ignore the rest of today’s lesson. However, if you’d like to create a base for your greenhouse that can later be decorated, then temporarily set your greenhouse onto a sheet of ½” foam core board (two sheets of poster board that have a half an inch of Styrofoam sandwiched in the middle). Use a pencil to draw a shape for the base, keeping the greenhouse centered in the middle of the shape you are drawing. Be sure to leave several inches of space around the building for decorating with plants and a sidewalk later. You may wish to draw a perfect oval or rectangle shape for your base, or create a curvy freeform shape like I did. Once you have a shape you like, cut your base out using a craft knife.
6. If you were unable to find foam core board that was already colored green, then you’ll need to spray paint your foam core board green at this point and let it dry completely.
7. Set your greenhouse on the center of your base and use a pencil to lightly trace the inside shape of the building onto the base. Set the greenhouse aside, and you should now have the floor for your greenhouse marked out and ready for finishing.
8. At each corner of the rectangle floor you just traced, use your craft knife to make a very small hole on the INSIDE of each corner. Then cut four ½” sections from toothpicks. Insert one toothpick section into each corner hole you just made, making sure to leave half of each section sticking out above the foam core board’s surface. These miniature sized “stakes” will help hold your greenhouse in place on the board and prevent it from sliding, but you will still be able to work on the flooring easily! If you’d like to, you can even paint these mini stakes white to blend in better with your greenhouse, then glue them into place for sturdier supports.
Start thinking of how you’d like the outside of your greenhouse to be landscaped, because tomorrow Dori Hatfield is showing us how to create an amazingly realistic looking stone floor for our greenhouses, and we’ll also be learning ways to surround the greenhouse with lush greenery using the flower and plant projects we learned last week!