Miniature University Workshop: Stained Glass Greenhouse
Lesson #1
Instructor: Melissa Darnell
Email for questions: [email protected]
Building the Building
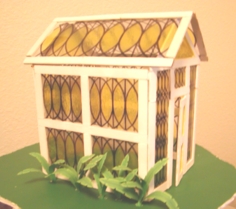
There is two ways to make this greenhouse, the more difficult but authentic looking way using popsicle sticks for a real wood frame, or the MUCH easier way using cardboard for the frame. The greenhouse pictured above was made using the real wood method, but took a LONG time to make!
Materials/Tools Needed Today:
large sheet of clear, stiff plastic (you can find this on boxes with large dolls inside, or get several pieces of this type of plastic from several products that are packaged in a plastic front that's been glued to a cardboard backing)
black permanent marker that has a fine tip
gift wrapping tape
scissors
computer and black & white/color printer
paper
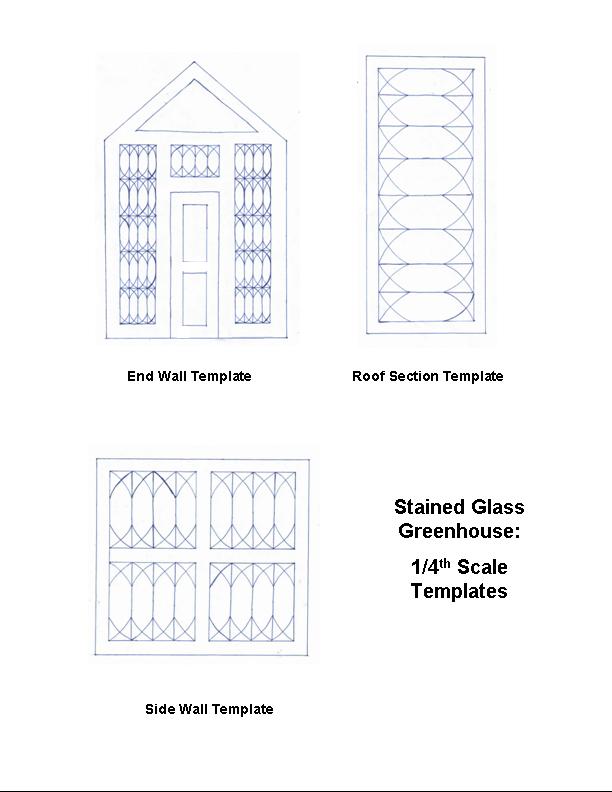
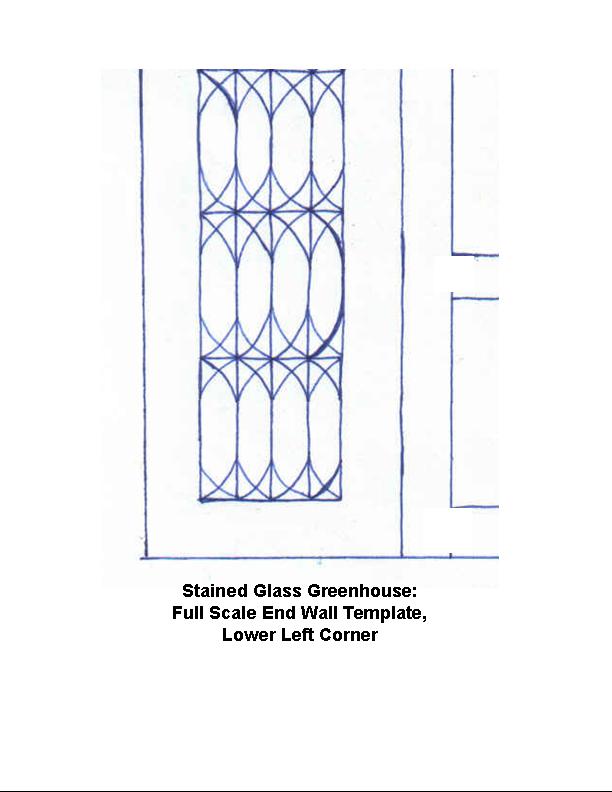
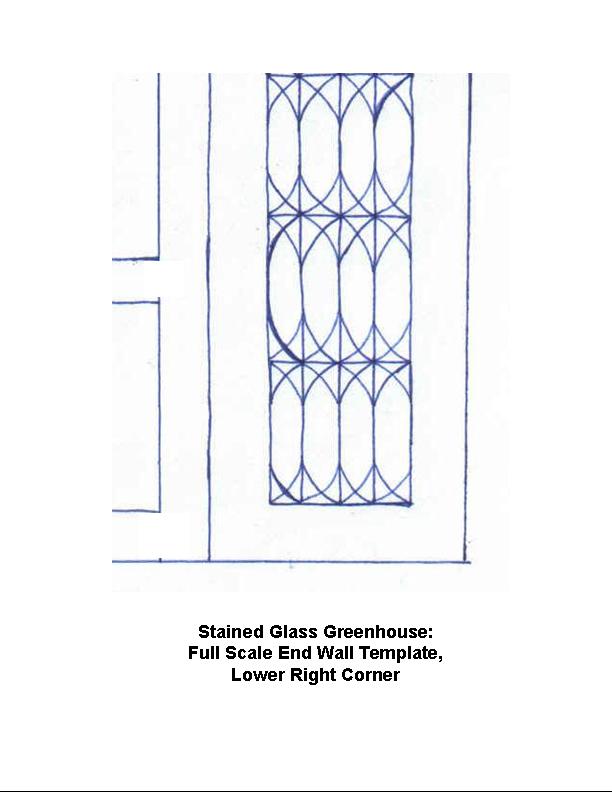
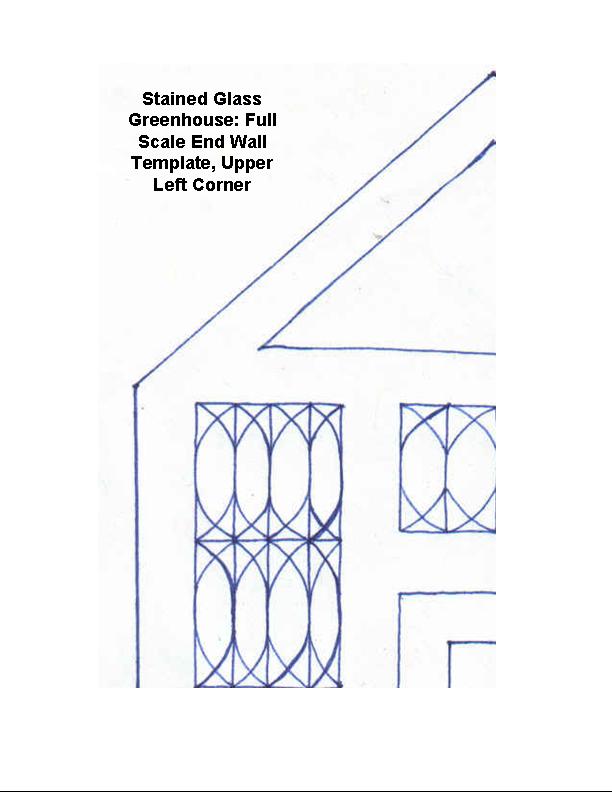
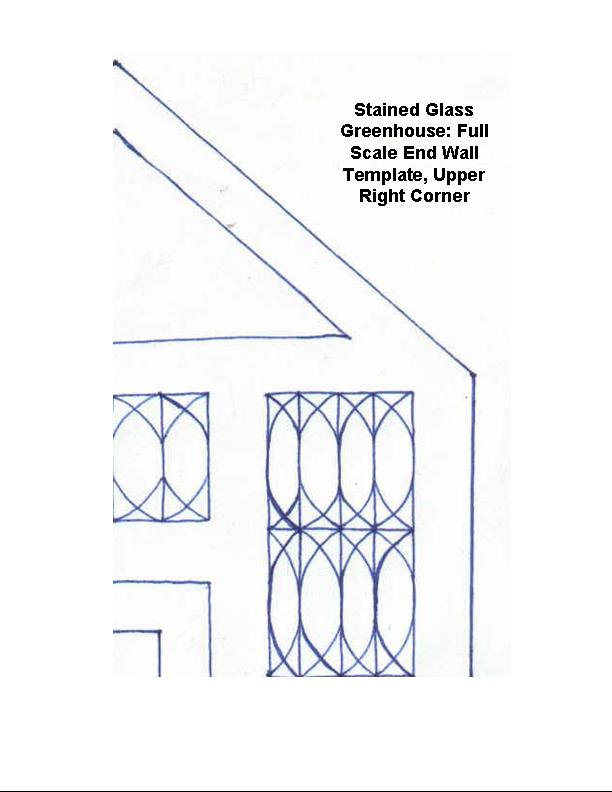
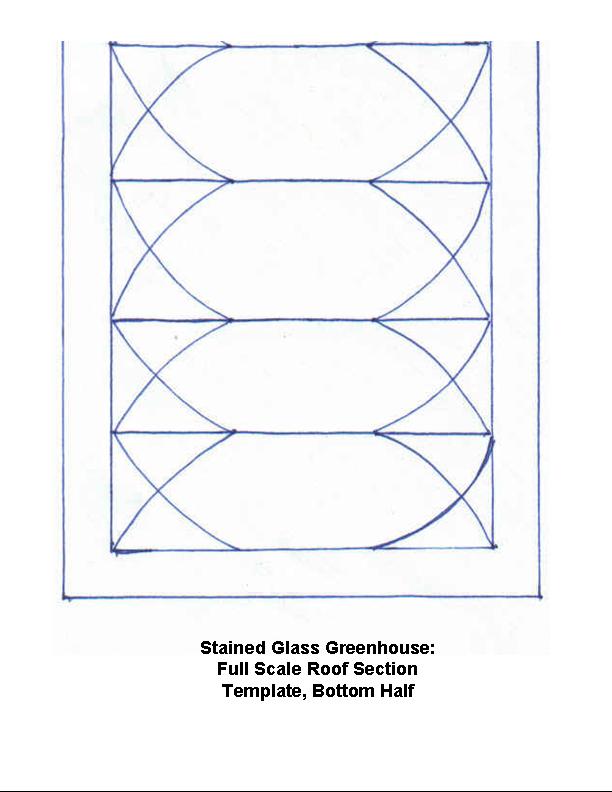
1. Decide what scale you’d like to build your greenhouse in, then resize all attached templates to fit your scale. You can do this by inserting each template into a Word document or a photo editing program, then use one of the online scales (links to these provided in our group website in the Links section). The one featured would be roughly a ½ scale greenhouse. (Please note: for 1/4th and 1/144th scale greenhouses, you’ll need to use an extra fine tip permanent pen instead of the regular fine tip permanent marker listed above for creating the stained glass “leading”.)
2. After resizing your templates, print them out. You’ll need to print out 3 copies of each piece for your building (one set of copies to be used for creating the framework, and 2 copies to be used for the stained glass design). Set one set of copies aside for later use.
3. Cut out each piece. You should have 2 roof sections, 2 end walls, and 2 side walls.
4. Tape each template piece to your plastic, then carefully cut the plastic closely around the paper templates.
5. Again tape the paper templates to their matching plastic pieces.
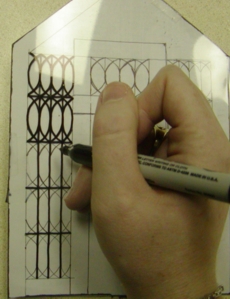
6. Now use your permanent marker or pen to slowly trace over all the lines in the stained glass patterns. Take your time with this step, as this will determine the overall look of your finished greenhouse.
Now take a break until tomorrow, when we’ll jump right in with creating the stained glass!
1/12th Scale Templates:
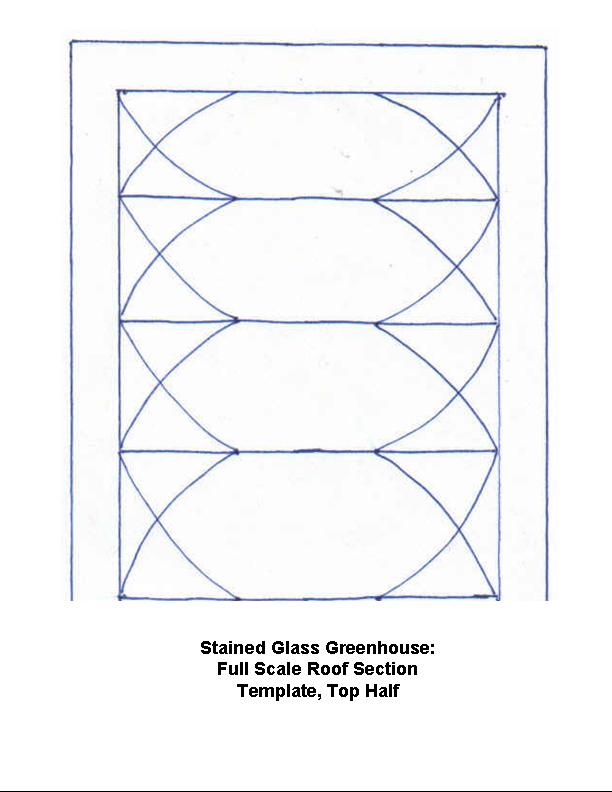
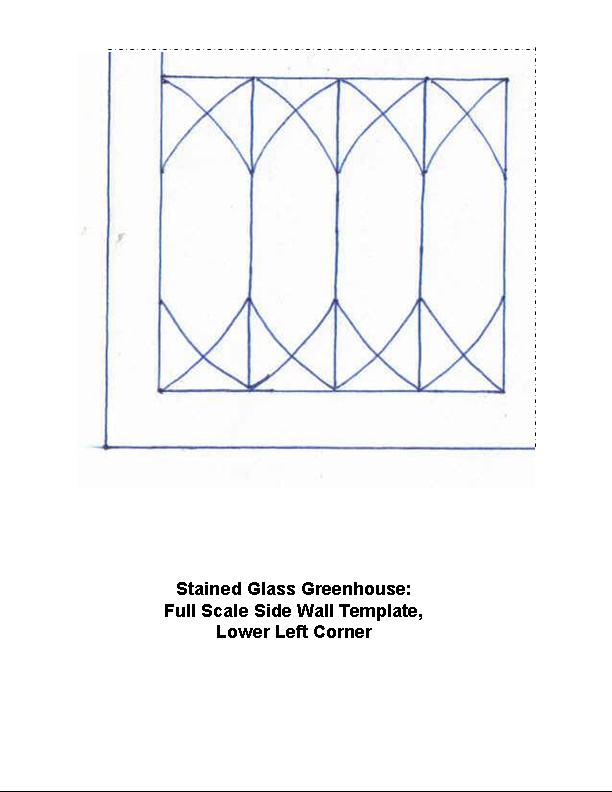
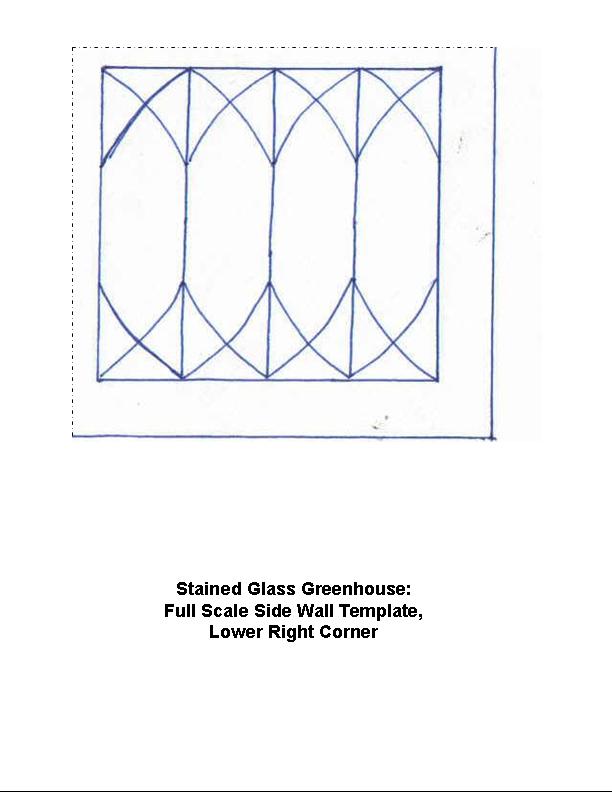
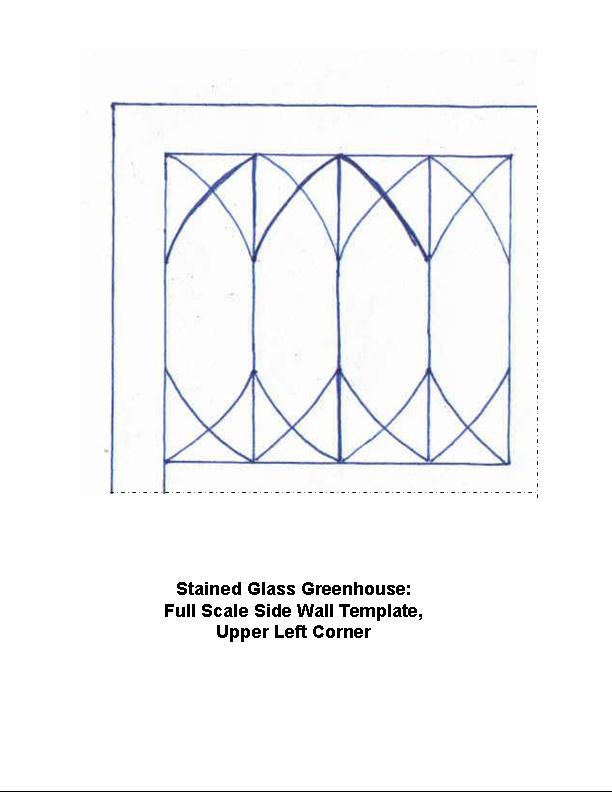
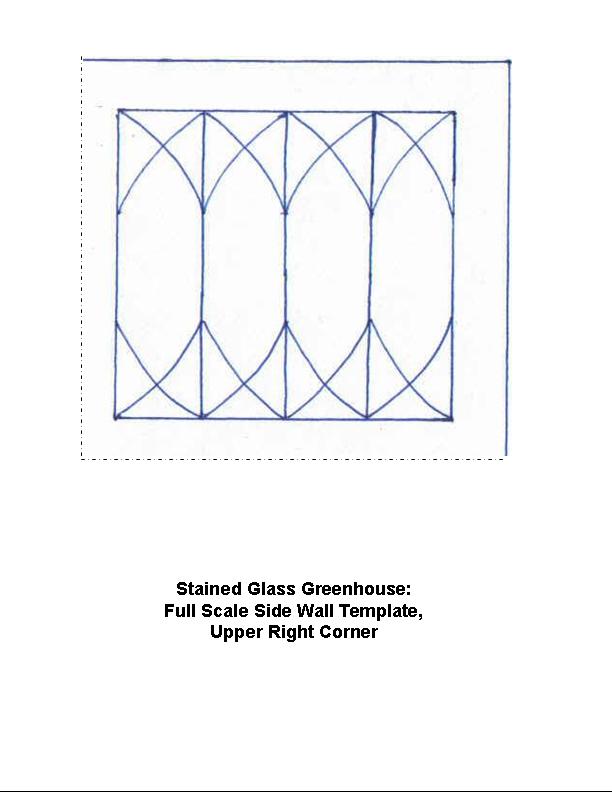
1/2 Scale Templates:
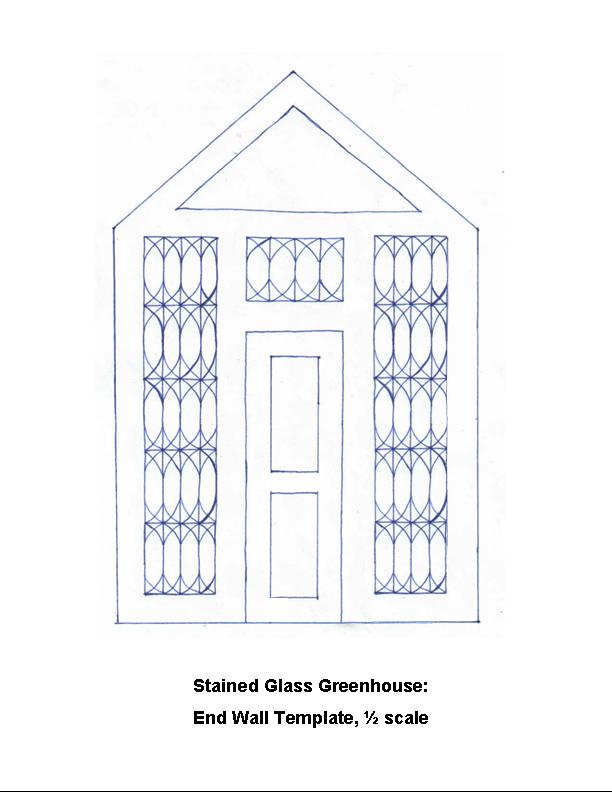
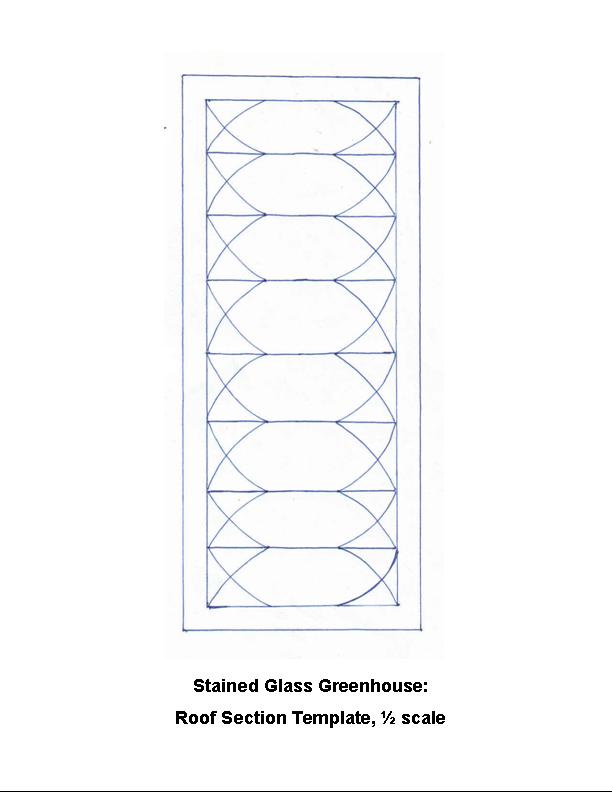
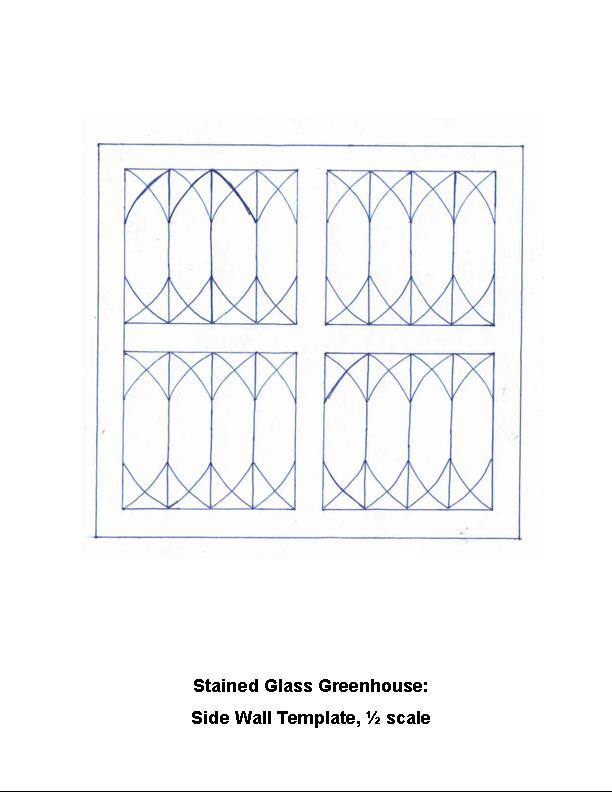
1/4th Scale Templates: