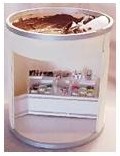
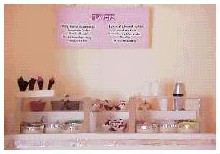
Miniature University Workshop: Ice Cream Shoppe
Materials/Tools Needed Lists
Instructor: Marie Gattis
Lesson #1: Creating the Container
Materials/Tools Needed:
2 10-inch embroidery hoops
½-inch foam core (enough for a 10-inch circle)
3 manila folders
Mat board (enough for a 10-inch circle)
2 pieces strip wood, ½ by 8 3/4 inches
All purpose caulk (white, paintable)
Paint in your choice of flavors (I used chocolate brown)
Ice cream scoop
2 small straws or coffee stir sticks
Menu sign – printable version included
Ruler
Tacky glue
Silver paint
Paintbrush
Utility knife
Stylus, empty ballpoint pen, or dull needle
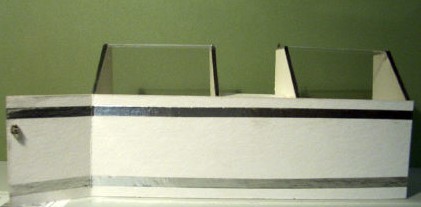
Lesson #2: Creating the Counters
Materials/Tools Needed:
Mat board – about two 8 x 10-inch pieces
Poster board – one piece about 8x3-inches
Gallery glass or other thin styrene
Silver tape cut into 1/8 and ¼-ich strips
7 earring backs
Ruler
Craft knife
Knife for cutting styrene
Tacky glue
Lesson #3 and #4: Ice Cream Treats
Materials/Tools Needed:
White caulk
Paint – chocolate brown, strawberry red, mint green, white
Fabric paint – red, brown, white for ice cream
Brown, white and tan Fimo, chopped into very tiny pieces
Tiny red beads for cherries
Ball-shaped candy sprinkles (I used real sprinkles – no problem with bugs)
Miniature bananas
Mini spoons and ice cream scoops (may use toothpicks painted silver)
Clear pushpins for ice cream sundae bowls
Tops from glue bottles for milkshake glasses
Inside packaging for capsules such as Contact for banana split dishes
Bowls for toppings
Thin nylon string (the kind that attaches tags to garments is perfect) for straws
3/8-inch wooden dowel
Cardboard, 1 x 2-inches
Tacky glue
Super glue
Scissors
Ruler
Saw for cutting pushpins
Pencil sharpener