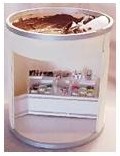
Miniature University Workshop: Ice Cream Shoppe
Lesson #1
Instructor: Marie Gattis
Email Marie with questions: [email protected]
Creating the Container
Materials/Tools Needed:
2 10-inch embroidery hoops
½-inch foam core (enough for a 10-inch circle)
3 manila folders
Mat board (enough for a 10-inch circle)
2 pieces strip wood, ½ by 8 3/4 inches
All purpose caulk (white, paintable)
Paint in your choice of flavors (I used chocolate brown)
Ice cream scoop
2 small straws or coffee stir sticks
Menu sign – printable version included
Ruler
Tacky glue
Silver paint
Paintbrush
Utility knife
Stylus, empty ballpoint pen, or dull needle
1. Paint both rings of the two embroidery hoops silver.
2. Using the inside ring of one of the hoops as a pattern, draw a10-inch circles on the foam core (draw along the inside edge of the ring) and also on the mat board. Cut the circles out using a very sharp craft knife. (Make a paper template also to be used later.)
3. Cut two of the manila folders into 9 x 11 inches pieces. Glue the two 9-inch sides together overlapping by about ½-inch to make one large piece. Make sure the creased portions of the folders are at the outside edges of the large piece.
4. Cut another piece of manila folder 2 ½ x 14 inches. Glue this piece to the previously made large piece, lining up with the long side and overlapping at each end to form a cylinder 10-inches in diameter.
5. Glue the cylinder between the two rings of each hoop, keeping the edges of the cylinder flush with the edges of the hoops.
6. To make the tile floor, use a stylus (or a ball point pen that has run out of ink) to scribe lines ½-inch apart on the foam core circle. Scribe another set of lines ½-inch apart at right angles to the first set to form the “tile” squares.
7. Glue the floor inside the manila cylinder keeping the bottom of the floor flush with the bottom of the hoop.
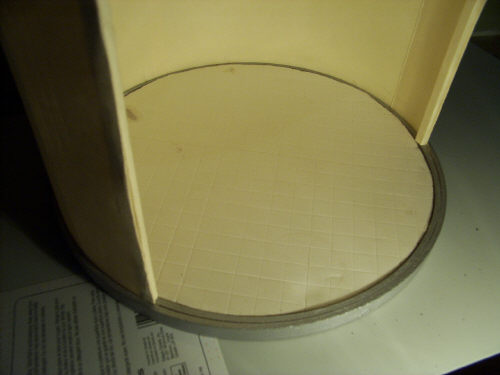
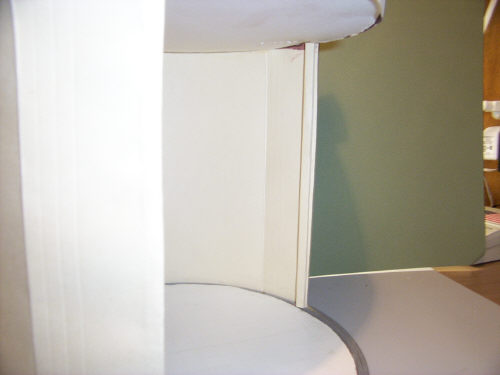
8. To make the ceiling, glue the mat board circle about 2 inches from the other end of the cylinder making sure the bottom edge of the circle is flush with the top edge of the opening.
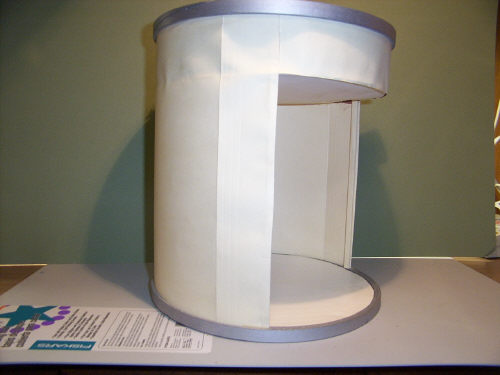
9. Glue the two pieces of strip wood to the inside the sides of the opening flush with the edges. This provides some strength to the opening sides.
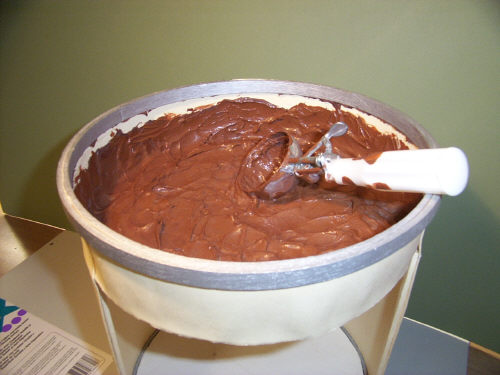
10. Use the caulk to partially fill the top of the cylinder with “ice cream”. Make the caulk uneven to look like scoops of ice cream have been removed. Bury part of the ice cream scoop into the caulk. After the caulk has dried, paint it the “flavor” of your choice. Make sure to smear some paint on the ice cream scoop handle and along the sides of the container. Remember, ice cream can be messy!
11. Print the menu board out on cardstock. Cut each of the tiny straws/coffee stirrers into 4-inch lengths. Glue the sticks to the back of the menu board. Using a nail or another sharp instrument, make two holes in the ceiling toward the back of the shoppe, the same distance apart as the glued sticks. Glue the end of each stick into these holes to hang the board.