
Miniature University Workshop: Stained Glass Greenhouse
Lesson #1
Instructor: Melissa Darnell; based on projects featured in the book "Miniature Worlds in 1/12th Scale," by Susan and Martin Penny.
Email for questions: [email protected]
Garden Watering Can Potting Shed
Materials/Tools Needed:
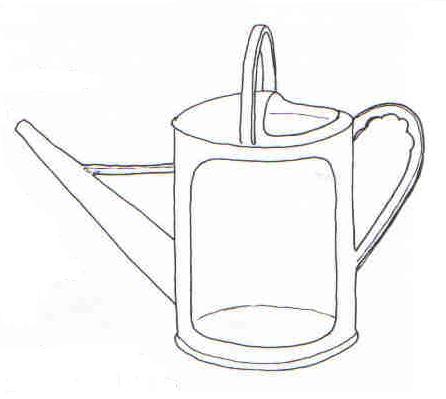
plastic watering can
plastic plant pot dish, terracotta-colored, with a
diameter that is 3 inches larger than the watering can base
industrial strength glue (Super Glue is a good one, or any glue that specifically says it will glue plastic to plastic)
brick colored polymer clay
green rope trim
orange string
silver spray paint
wooden popsicle sticks
small round fish tank pebbles or miniature gravel
white water-based primer paint
pencil
acrylic paint in brown, pale blue, and cream OR a sheet of scrapbook paper that looks like pine wood grain OR a sheet of light colored wood veneer
spray acrylic seal in matte finish (Krylon makes an excellent one, available in the paint sections of most stores)
small tip paintbrush
white/school glue
a small drill
craft knife
fine sandpaper
This project has a lot of materials/tools needed, but everything is in small quantities, most items you may already have around your home, and the project itself is very easy to do with no special skills required.
1. Start by deciding how large a hole you want to make in the side of your watering can. The larger you make the hole, the more area inside you’ll have to decorate. Draw this opening on the side of the can using a felt-tip pen. Use your craft knife to cut this opening out carefully. If you have any extra rough points along the edge, use a bit of sandpaper to sand the edge smooth.
2. To prepare the outside and inside of the can for painting, lightly sand all its surfaces with fine sandpaper to provide a rough surface for the paint to stick to. Lightly wipe the surfaces clean of any dust.
3. Paint the inside and outside of the can with the primer paint using a disposable paintbrush and let dry completely.
4. Spray paint the outside of the can with the silver spray paint and let dry. Then spray with a coat or two of clear acrylic seal to protect its painted finish and let dry.
5. To create an interior that looks like it’s the inside of a wooden potting shed, you can either cover the inner “walls” of the can with a sheet of scrapbook paper printed to look like pine wood, glue on a sheet of pine or other light wood veneer, or you can paint on faux wooden walls using a base coat of cream acrylic paint followed by vertical streaks of pale blue and brown.
6. Now to prepare the base of the shed. Start by flipping over the plastic plant pot dish bottom side up. Mark off several evenly spaced dots where your fence posts will be inserted at. At each dot, drill two holes (one directly above the other) to create a “slit” to insert each fence post in.
7. Cut off a 3 inch length off each popsicle stick (one length for every post hole you just drilled). You can either choose to have flat topped fence posts as shown in the picture, or use the curved end of the popsicle sticks to create a cottage style fence with more decorative rounded top fence posts. Make sure each fence post’s cut end has a straight cut edge (a slanted cut edge will make the fence post lean).
8. Drill one hole near the top of each fence post. This hole needs to be large enough to thread your orange string through (don’t thread the string through yet though!).
9. Lay out your fence posts on a sheet of old newspaper or cardboard in a well-ventilated area, then spray paint them silver or white. Let dry, then spray paint the other side of the fence posts and let this side dry as well.
10. Use lots of the industrial strength glue on the bottom of the watering can to attach it to the center of the plastic plant pot base you previously drilled holes in. Make sure the shed is centered among the fence post holes you drilled, then let the glue dry completely. You may even want to set something heavy inside the can to help press it firmly to the base while the glue sets.
11. Now add your fence posts to the base. Use a hammer to lightly tap the top of each fence post to help insert them into their post holes drilled earlier. Underneath the plastic base, add a blob of hot glue to the underside of each post to help hold it in place.
12. Thread a long length of the orange string through all the fence posts, making sure that the string drapes slightly in between each post. Leave the space between the two front posts open for a walkway, and tie the ends of the string at these two front posts into knots to hold the rope fence in place.
13. Use the industrial strength glue or the hot glue (whichever you prefer) to glue the green rope trim to cover the cut edge of your can’s opening.
14. Warm up the brick colored polymer clay in your hands until its soft, then form it into a block that will fit as steps in front of the can’s opening. Use a pencil to draw lines in the clay to form bricks, then bake the steps as directed on the clay’s package. Then glue the steps to the plastic base in front of the can’s opening.
15. Now to add the pebble ground covering. Smear white/school glue in small sections onto the plastic base around the watering can and fence posts, then cover the glue with the small pebbles. Lightly press the pebbles into the glue as you go. Repeat until the entire top surface of the plastic base around the watering can is covered, and let dry completely.
More ideas:
You could also use other landscaping materials instead of pebbles around your watering can, or even use Dori’s egg carton stone flooring technique (see our archives, Stained Glass Greenhouse folder, Lesson #4) for ground cover. Or use a combination of both... use train landscaping materials to simulate grass around the can, then use Dori’s stone flooring to create a stone or brick walkway leading up to the brick steps!
Add hooks to hang mini tools and gardening hose from (use a silver earring post glued to the wall).
You could even add cardboard shelves to hold more tools and gardening items (press a piece of thin wire to the back wall of the shed to find its interior shape, then trace the shaped wire onto paper to create shelf templates, cut shelves from thick cardboard, then glue them in with hot glue).
And don’t forget to add lots of plants from our Flowers & Plants workshop (see the archives for this workshop’s folder).
Need a smaller watering can for a smaller scale setting? Try looking for watering cans for dolls or Barbie dolls. These smaller scaled watering cans are perfect for making 1/4th and 1/144th scale potting sheds! Or you can make a paper one at http://printies.homestead.com/index4.html. Just download the garden shed zip file for the entire gardening shed, and you’ll also get the watering can plus a really realistic looking barrel of water that could also be turned into a 1/144” scale container room.