Step 1: Gathering the Materials
|
Step 1: Gathering the Materials
|
|
|
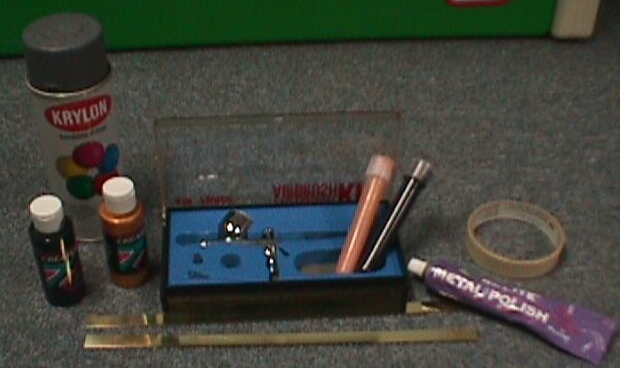
Ah, the materials are eager with anticipation to get to work. We can see some brass strips, masking tape, metal polish, primer, and my airbrush. I still have not decided whether or not I want to use this to apply the colors with as I believe spray paint may be less time consuming. |
|
Step 2-3: Polishing and Masking the Hilt
|
|
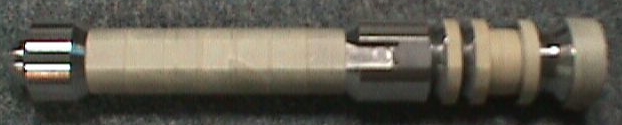 |
Unfortunately, my digital camera's battery was running low when I took the before and after pictures of the polishing process. But just compare yours to the pommel especially to see how well my Rolite did. Now in Step 3, we will mask the saber in preparation for painting the black area. Grab your trusty masking tape (I also got some thin stuff from a hobby store, it made the smaller parts a LOT easier. Mask according to the photo. Only mask the vertical surfaces! That means you only need to make a wrap around the saber to mask it- the inside parts will be painted. Also, make sure you mask the place where the activation panel will fit it (unlike me). Don't worry if you don't mask it perfectly, because if you get some paint spots where you shouldn't, you can just wipe them off with paint or lacquer thinner. |
|
Step 4: Prime Time
|
|
 |
Now we can get down to business! Take out your Krylon Sandable Primer and prime away. Make sure you hit every nook and cranny! The best way to do this is hold the grip section in your hand and hold the saber at different angle to get the primer on all parts. I hope you read Step 2 and 3 though, lest you just go priming without masking the important parts! Let it dry for about half an hour. |
|
Step 5: Applying the Black Paint
|
|
 |
I decided to put my airbrushing skills to the test and I'm very pleased at the result. If you are using an airbrush, I used Black Opaque from Createx (they make paints especially for brushing.) Thin it to a 50/50 water and paint combo and spray away. Otherwise just shake that can of spray paint, point, and shoot. |
|
Step 6: Gold Paint and Clearcoat
|
|
 |
Next get your gold paint. Unmask the gold area and just repeat Step 5. I used Createx Pearl Copper here. Colorplace's gold color (available atWal*Mart) would work as well I bet. You'll probably get some paint on the black areas. Don't fret, just cover up the gold (or don't- how daring are you?) and retouch the black areas. Hell, just repaint the whole thing and give it a second black coat like I did! Then once everything's dry (about 1-2 hours for spray paint, or 15-30 minutes for airbrush [gravity-feed here]), apply a clearcoat. I planned on using a satin finsh, but since I used all that on my food capsules (D'OH!) and didn't feel like going out to get some more, I used some Krlon Matte Finish which I like just as much. Apply 2 coats. |
|
Step 7: Adding the D-Ring
|
|
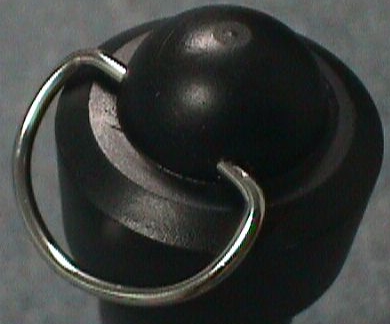 |
First of all- KEEP YOUR MASKING TAP ON! This way, if you scratch the pommel while putting the D-ring on, you can repaint it faster. It it's just a little scratch, just get some paint and use a pencil or a small paintbrush (what a concept...) and touch it up that way. Now if you're Superman or just plain strong, bend the D-ring apart. Try only to bend one side and make it easier on yourself. Insert the flat part (on the side you didn't bend) into the hole. (Masking tape helps in the next parts so you don't scratch it.) Now grab some pliers and straighten the part you bent. Now take both sides (left and right) between your pliers and bend it back to the original shape fitting it completely into the hole. |
|
Step 8: Removing the Mask
|
|
 |
Figure that one out, genious. After the tape is off, use a Q-tip (pull the cotton off) dipped in lacquer or paint thinner and take any paint spots off the unpainted parts. |
|
Step 9: The Control Panel
|
|
 |
Put the panel in half-way and mark (with a pencil) on the hilt where the bottom ends (on the grip/main part of the saber). Grab some 2-part epoxy, super glue, krazy glue (what I used), etc. and and make a small (but not super thin) line of glue up the length until the length gets cut off from the milling (the upside-down UU part). Also apply pencil thin line of glue to the small cut-off part at the top (on the underside) so it sticks up there too. Now push the panel in with pressure, but ever so gently. It probably won't go all the way down so grab your tape, cover the curved part up, and use a rubber (hmmm I wonder why?) mallet to pound it in. |
|
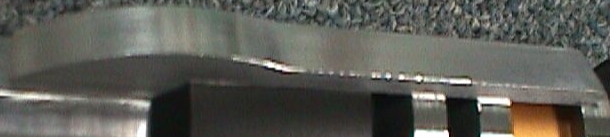
Step 10a: The Brass Strip (Cutting and curving)
|
The Final Stretch!
|
 |
Grab your brass strip (should be 1/2" wide). Now take a marker and mark off where the curve is and where your going to cut the flat part. Take a pair of good wire cutters and use them ONLY to cut the line- not the curve. For the curve, use an electric drill or a dremel to get the basic shape. The use a metal file to get it into a nice uniform roundness. Finish the curving off with a fine grit sand paper (doing this to the other end wouldn't hurt either). |
|
Step 10b: The Brass Strip (Bend and Applying)
|
|
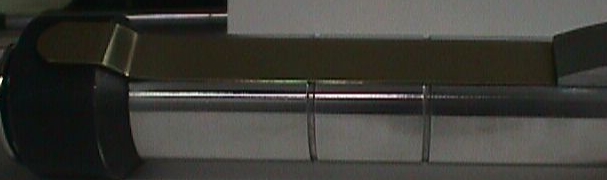 |
Ah, the last hard step. And the most challenging so be careful. I hope you bought extra strips... Now wrap some tape onto the brass strip so you don't scratch the metal when you bend it. Hold the top up to the activation panel (like it were there already) and have the other part lay on the pommel. Mark off where to make the two bends (they're about 1/8" apart or 6mm). Now using a vice, bend away. Be sure your metal is completely level when you tighten the vice or you'll get a crooked bend. |
|
Step 11: Activation Strip
|
Comming Soon!
|
|
Detailing Your Lightsaber
|
|
|
|
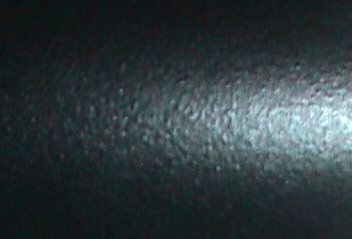
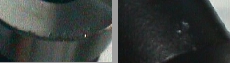
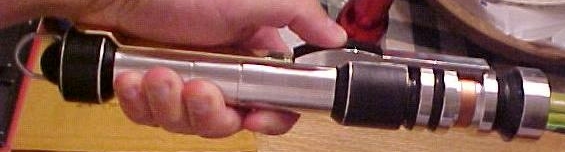
First, I will discuss texture. The first image is a closeup of my black areas. As you can see, it is bumpy, which gives it a more metallic look than just painted aluminum. To do this, I used my clearcoat but only shook the can for 1/2 the time and getting a fuzzier spray resulting in, well, that. Your clear coat also determines the luster. If you just like the paint the way it is, use a matte coat. If you want a semi-gloss, go with a satin finish. These two are your best options. The third would be to use a gloss coat, but that is known for showing fingerprints very easily. And as a reminder- mask the areas you don't want painted. Now onto weathering. The next picture you see are details of what will happen if your saber falls onto your cement driveway. If you're going for a used look, this could work for you. I however, wanted mine clean so you can image how hard it was to hold back from yelling "SHIT!" when I heard that *clink!*. I was able to get most of the burrs out after I took the picture with my cleaner/polisher. The best way is to go with the paint. The final image is Tim's saber. You can see the edges are where the most weathering is. To get that effect- wear it around with you 24 hours/ day and you'll see results in a few weeks.......mmmm...that or you could just scape the paint off with a scouring pad or your fingernail ;-) |
Well, that's it guys. Once you're done PLEASE e-mail me pictures of your finished product and what techniques you used. I'll post them on the completed page with the rest. So far, we have Mara Jade's Father, Jedi135, and myself (Master Windu) up there. We look forward to seeing yours! Thanks and may the force be with you.
Kevin Sweeney
Master Windu
P.S.- See you at the Jerec Lightsaber Active Project sign-up sheet. I'll make a page like this and of completed ones too. Then we need Yun's definately, and then two or three more to complete a wine rack ;-)