Fitting Pants:
Some Facts:
Pants draft from the floor UP; whereas, bodices draft from the shoulders Down.
The floor to waist minus the inseam = the rise
The rise has the front or back crotch fork along with the curve and the
extension......so you are breaking that crotch length into three separate
sections....
If the allowed length lets say a crotch length back is 14
you need to get the straightish section PLUS curve plus extension balanced and
everything within the confined space. in DS the LENGTH is increased, IN UP the
EXTENSION is increased
Make a “J” with your index finger and thumb on your right hand.....extend
the thumb down and you will see the curve of that section between fingers
straighten.....move the thumb upwards a little and see the curve dramatically
increase......
First make sure the crotch lengths are correct. Measure with a single tape the
total crotch length front to back waist.,
Now use the three tape method ( see rosebud class) described often with the zero
point in the middle of the middle....check front crotch and back crotch. Total
the two and make sure it totals the single tape.
Triple check your inseam from crotch to floor.. DO NOT ADD any ease !! The
program will do that . Run the tape from the center crotch to the floor.
Double check your body depth...with the straight edge held FIRMLY at the front
of the pelvic bone you are measuring BODY DEPTH where the extensions of the
pants ride.. not the top of the thighs and not the belly.
Finally and maybe most importantly redo the floor to waist measurements.
Contoured means you run the tape from the floor to the waist over the body’s
curves.......it will be considerably longer than the floor to waist straight
measurements.
It is most likely this is the primary culprit if you get a high extended
waistline especially at center back, or a weird crotch curve.
Remember floor to waist minus inseam = rise.........so if the floor to waist is
NOT long enough the rise will be short and you are asking the program to put the
crotch length/curve and extension into too small a space.
Increase the floor to waist and bingo there’s enough room there to fit
everything.
Ease:
There is no way you can determine if the fit of a particular silhouette is
going to reflect your desires till you know what each silhouette represents.
When the program says 0 ease on the options page it means its set to zero AFTER
the design AND wear ease are added....anything you add or subtract is in
addition to what is IN that design.
See pp 90-91 of the manual under the bobbing purple question mark to see the PROPORTIONAL ease in there.
Brilliantly the program does not take a flat number and add it to a measurement ( how silly would it be to consider that a size 2 needs the same ease as a size 5X but RTW does!!) anyway.....percentages of your real measurements are used.
You should print a quarter scale with grid and ease line buttons turned on of various pant styles...cut ‘em out.
Use colored pencils or something to clearly mark them....lay one over the other. and play with them....
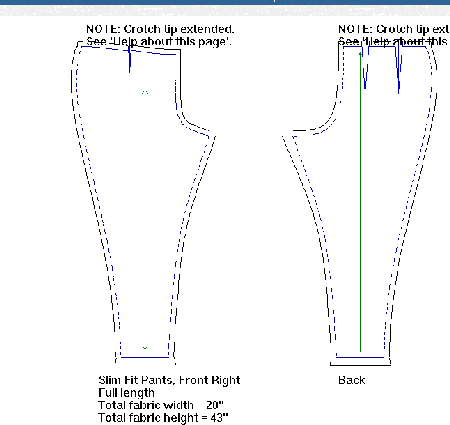
An example from my chart in order
slim fit, fitted semi fitted, cargo
If I had the ease and grid lines on you could count the exact number of boxes or inches of ease available on each style line
You will find MOST ease is applied in the legs ......
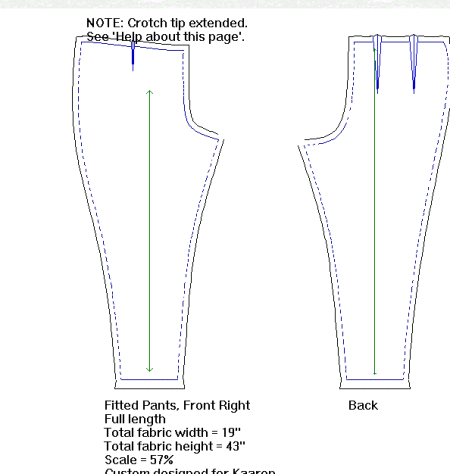
Using the ease lines shows the actual measurement line AND the measurement line WITH ease before the pattern has been "smoothed" so it can sew together.
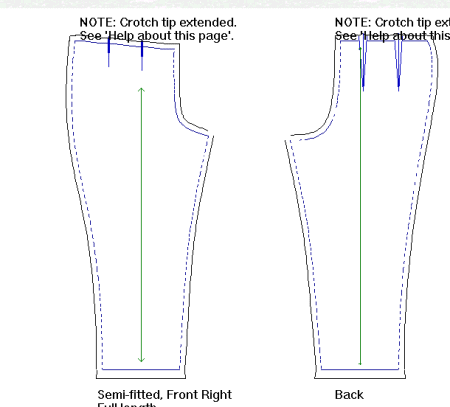
Having this small pattern pieces in your hands and VIEWING them UPSIDE DOWN from the hem at top down ( the way pants draft is from the floor UP) takes away the distraction of the pattern pieces and allows you a really visual understanding of what you have.
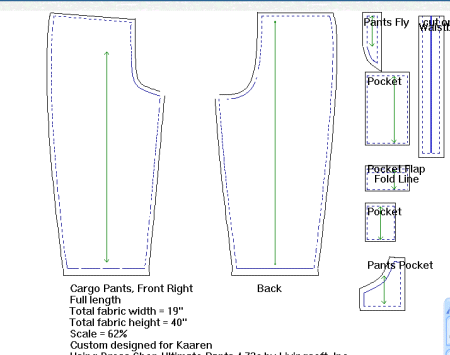
It takes only a few pieces of paper and is a worthwhile lesson in how and where ease is applied.
© 2003 Kaaren Hoback, Dryden, New York, www. patrns4u.com