 |
|
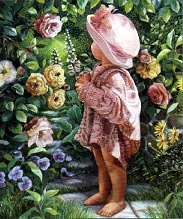
You will need two
images, The key
to this way of
masking is to have
two images you
like and will look
well together.
We will start out
with two fairly
easy images to mask.
Right click on
the images below, and save
as and save to
your hard drive. Or use
two of your own
images.
 |
 |
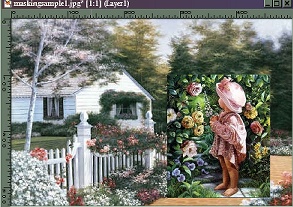
First, copy and
paste the
image of the little
girl to the
background image
of the house,
as a new layer.
If
using your own
images, you
may have to resize
them. Your
image should now
look like this.
 |
Next, place your
image that you
want to mask where
you want
it on the background
image.
You have to be
careful
because sometimes
you are
unable to move
the image once
you have started.
So try to
place it exactly
where you
want it to be.
This doesn't
happen with all,
but it does happen.
Next, go to Masks/New/Show
All/
Masks/Edit.
Set your foreground
color to
black and your
background color
to white.
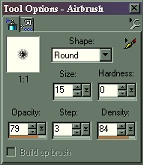
Next choose the
Airbrush with
the following settings.
There are
a few things to
remember with this
tutorial. The settings
below are
just what I used,
You will want to
play with the settings
a bit, each time
depends on your
images.
 |
Now the fun part,
First I zoom in,
makes it much easier
to see what
you are doing.
Next, left click
on your mouse and
erase the parts
of the mask you
don't want to
show in your image.
I usually
do around the outside
and get
all that first
then lower the
size of the airbrush
and move in
for the tougher
areas. Now should
you erase
to much, don't worry
you can right click
and go over that
area again and
it will
bring back the
part you didn't
want to erase.
Your image should
start to look something
like this.
 |
Isn't this easy!!!!
Just keep erasing
until
you have the image
the way you
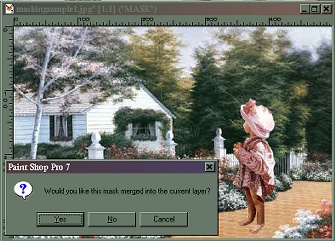
like it. When done
go to Masks/Delete
A box will come
up asking if you want to
merge this mask,
click on yes.
 |
Now you can add
a drop
shadow if you like
to layer two,
then merge all.
Add your finising
touches,
such as a frame
or whatever you
want to do to the
final image.
That's it, wasn't
that easy!!
Below is my final
image.
 |
This is one of my
favorite ways of adding
images to another,
it seems so quick and
easy to me. I hope
you have enjoyed this
tutorial, and remember
try different things
with it, you will
be surprised with what you
end up with.