Two sources for Web graphics:
|
|
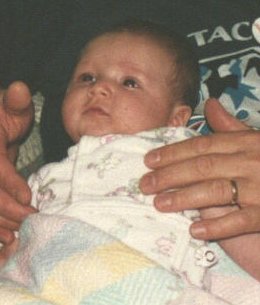
I cropped a photo of my husband holding our niece, Mary, to isolate Mary—red eye and all. The photo comes from a picture CD obtained when the film was processed. | Mary looks less diabolical here because I removed red eye by selecting the affected area, using the eye dropper to pick up the predominant eye color from a nearby pixel, then pouring that color into the selected area. Of course, an easier way to do this would have been to open the photo in Microsoft Picture It! and click on “correct red eye.” |
First, I resized the original picture to 33% of its original size so that I could display two deformations side by side on my Web page. |
|
|
|
|
|
|
|
|
|
|
|
|
|
|
|
|
|
|
|
|
|
But I really wanted to apply filters to this image:
|
I chose this image (which I cropped from a larger photo) because it has interesting lines that I thought would illustrate well the effects of filters. |
|
|
|
|
|
|
|
|
|
|
|
|
|
|
|
|
|
My husband took this photo with his digital camera, a Sony Mavica. (And yes, those are the actual colors.) The Mavica uses ordinary computer disks to store images. We find this storage method to be an advantage because you do not have to hook the camera up to a computer periodically to dump the pictures. But you do have to carry around a slew of disks! |
|
This image, which I cropped for use in exploring filters (above), was scanned into Paint Shop Pro with a Visioneer OneTouch 7600 scanner. This scanner offers two resolutions for color scanning: 100 and 200 DPI. I scanned this photo at 200 DPI. |