Written / Photographs by: Tony Carricaburu
INTRODUCTION:
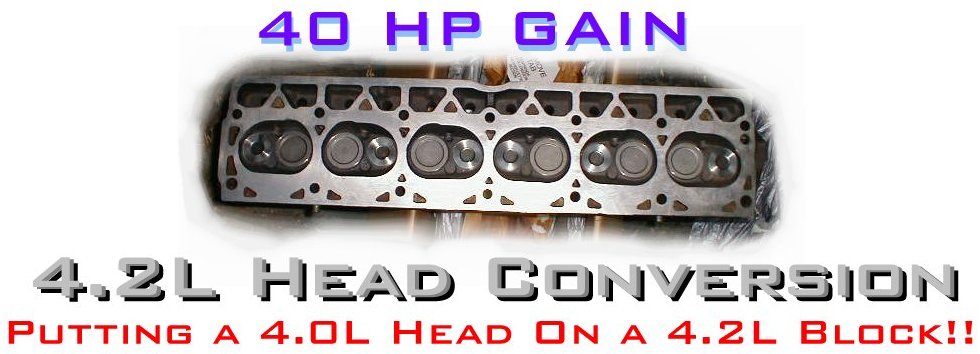
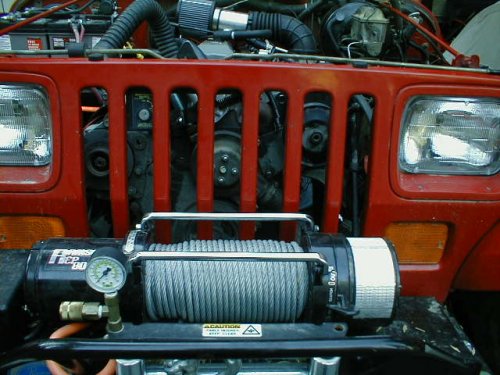
In this article I am going to explain the basic fundamentals of a not so hard shadetree mechanic Head conversion on a 4.2L 258ci. Block. As I'm sure any Jeeper knows these are the engines that came in the CJ's and early YJ's mainly. After several months of research I came upon some discoveries about putting a 4.0L head on a 4.2L block. Apparently the Block on a 4.2L and 4.0L are very similar except the 4.2L has a longer stroke and a few different design differences. After I sent several e-mails trying to find out more information about this conversion. I was informed that this conversion is possible and can provide 40hp gain. That's right 40hp! I was a little surprised myself. Not only does this conversion add more hp, but I have read that people have experienced a substantial increase in Mileage. Approx. 17-18mpg.
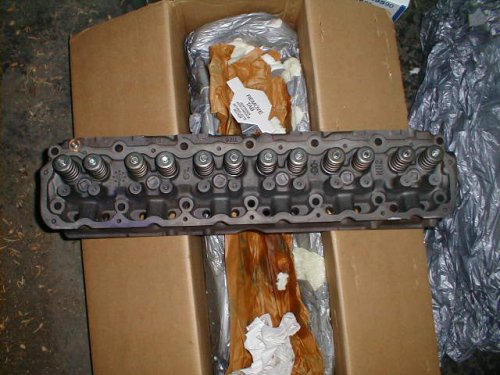
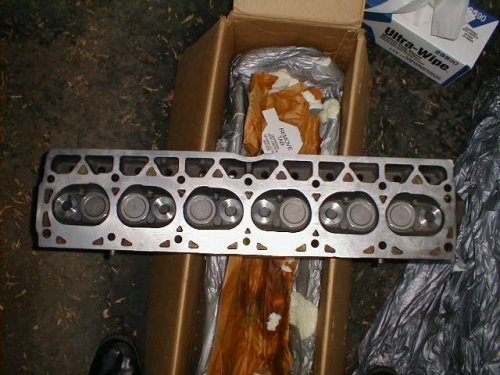
I began searching for a 4.0L head and found just what I was looking for at Koller Dodge (check there website for more details). They provided a remanufactured head, completely rebuilt and basically new. From here there are a couple Retro-fit modifications needed to make this work right. Don't worry they don't require any difficult procedures or special tools. Below is a picture of my new 4.0L head upon arrival via UPS.
PARTS LIST:
4.0L Head Provided by
Koller DodgeExhaust Manifold Gasket
4.0L Valve Cover
4.0L Valve Cover Gasket
Tubes of QuikSteel Epoxy Putty
Sand Paper (fine)
REMOVAL OF OLD 4.2L HEAD:
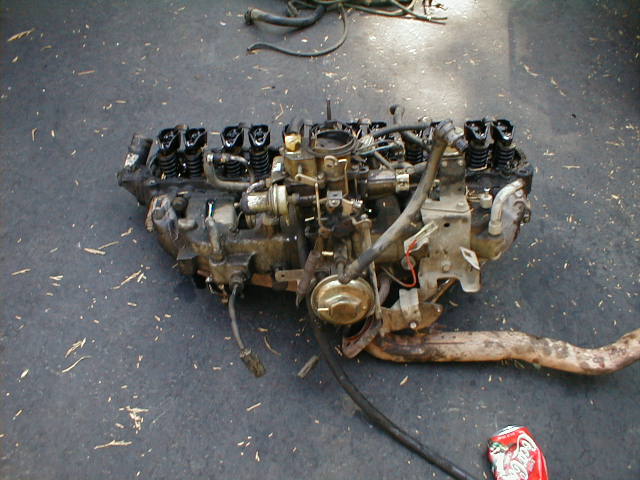
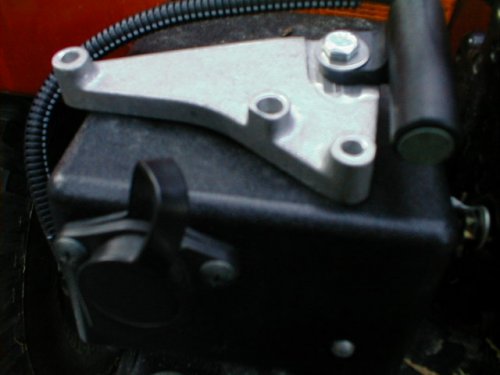
This part was almost a dream come true. I have wanted to remove the old head and intake system for as long as Ive owned the Jeep. I started by removing the air cleaner, valve cover, power steering pump, radiator hoses, etc. NOTE: I didn't remove the Carter carb. and intake because I had other plans involved with the Intake system. (Check next months Issue for more details) Anyway after removing the head bolts and removing all the rocker arms and rods so they don't get bent upon removal. The pictures below show the Head removal process.
(Click on images for large view)
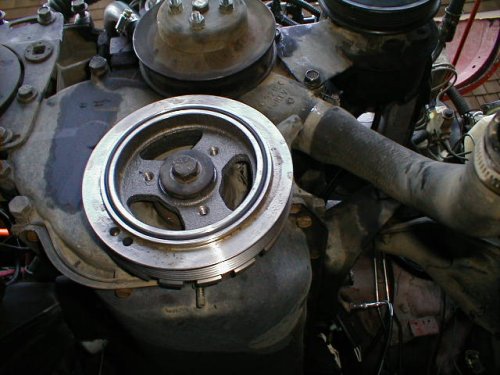
INSPECTION AND CLEANING:
After The 4.2L Head, intake and Carb. was removed I was really surprised to see how clean the cylinder walls and pistons where. This engine currently has 98,000 miles on it and appears to be in really good condition. I was afraid I would discover some problems upon removing the head, like excessive carbon build-up or scratched cylinder walls. I guess it make since the engine never burned oil, just didn't run good, that was probably do to the Carter carb and poor adjustments. Well anyways I went ahead and cleaned whatever I could while the head was off. I scrapped off the entire old head gasket and cleaned the new mounting surface.
INSTALLATION:
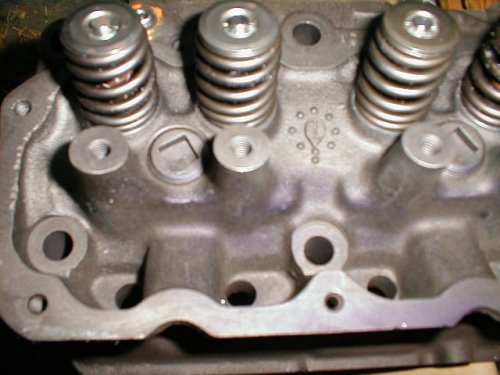
PART 1:The first step is to prepare the Head for installation, after you've obtained all the parts from the parts list you will need to perform the following task. In order for the 4.0L head to work on the 4.2L I had to fill in a couple water jackets in the 4.0L Head. They are the small triangular water jackets on the same side as the Intake. These must be filled because on the 4.2L block these water jackets don't exist. I made a couple calls and came to the conclusion that the best way to fill these holes in is to use a high temp. Epoxy Putty. I bought two tubes of QuikSteel. Since the holes in the head expand inside it makes it much easier if you use foam-packing peanuts to fill in the holes. I used on packing peanut for each hole. This makes applying the epoxy much easier. Don't worry the foam peanut will dissolve. After filling in the holes, make sure there isn't any burs or pieces of epoxy sticking up above the heads surface. I used some fine metal sandpaper so ensure the head would make mat up perfectly to the head gasket. It's very important that the head is completely smooth to ensure no head leaks, compression loss, or blown head gaskets, etc. Below are some pictures of the holes filled in.
(Click on images for large view)
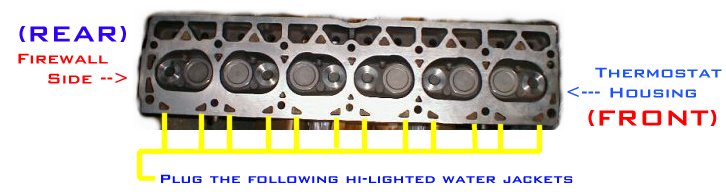
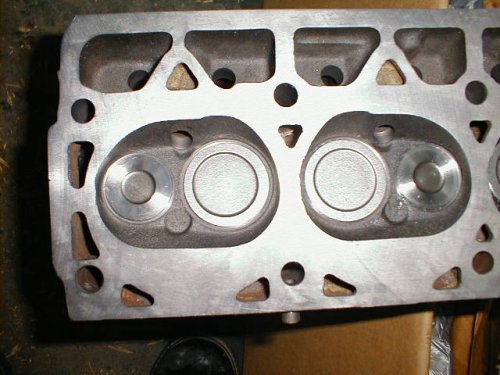
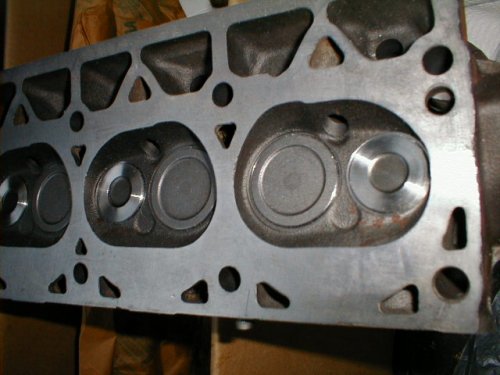
BEFORE PLUGGING WATER JACKETS:
AFTER PLUGGING WATER JACKETS:

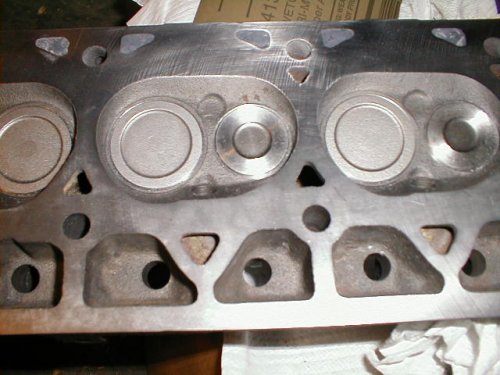
DIAGRAM 1.3
This Diagram shows exactly which holes need to be filled on the new 4.0L head in order for the conversion to work. NOTE: Its very important that you plug only the holes that are shown in the Diagram. If you accidentally plug additional holes in the head it could cause your engine to overheat or cause other problems. See Diagram below for details.
(Click on Diagram 1.3 for printable size)